Show Posts

This section allows you to view all posts made by this member. Note that you can only see posts made in areas you currently have access to.


Messages - Rancid Crabtree

Pages: 1 ... 18 19 [20] 21 22 ... 26
286
Archery / Longbow Build along (Page 2) (Part 10)
« on: April 19, 2008, 08:35:31 PM »
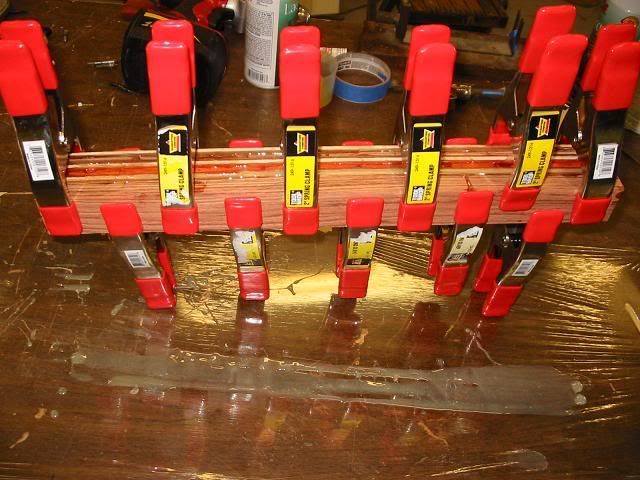
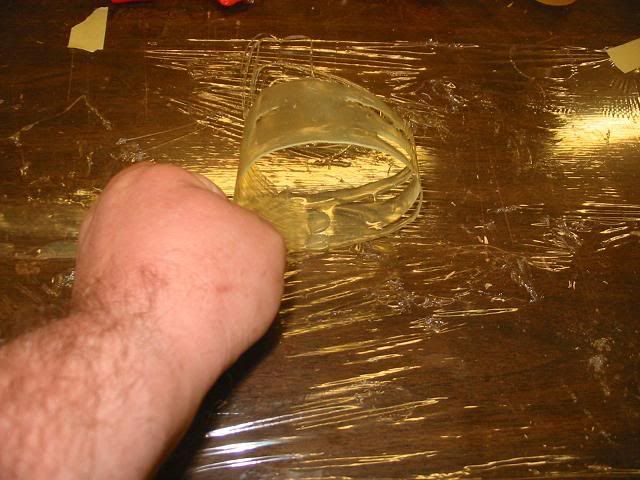
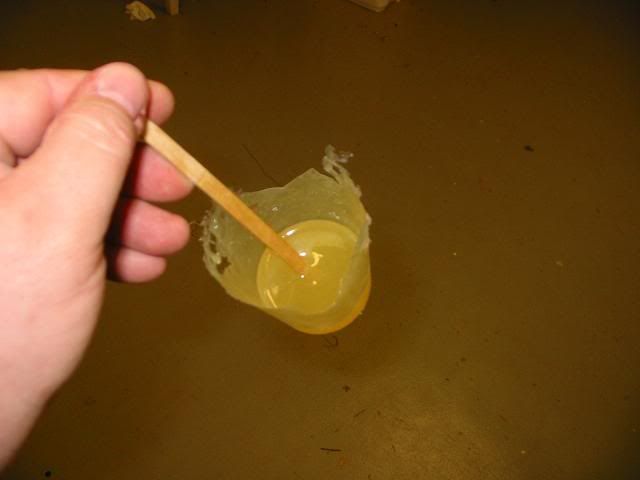
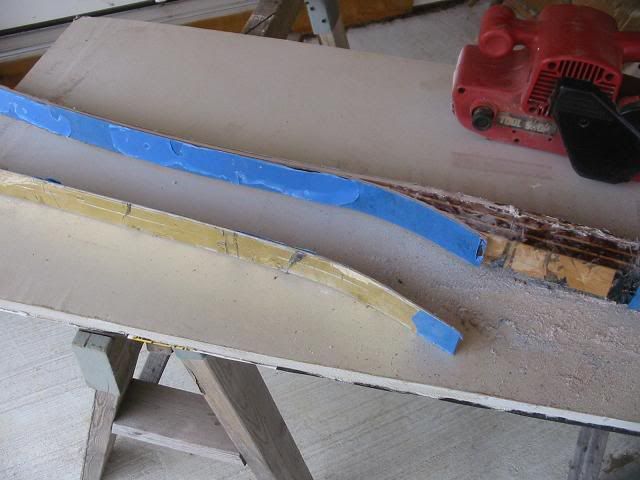
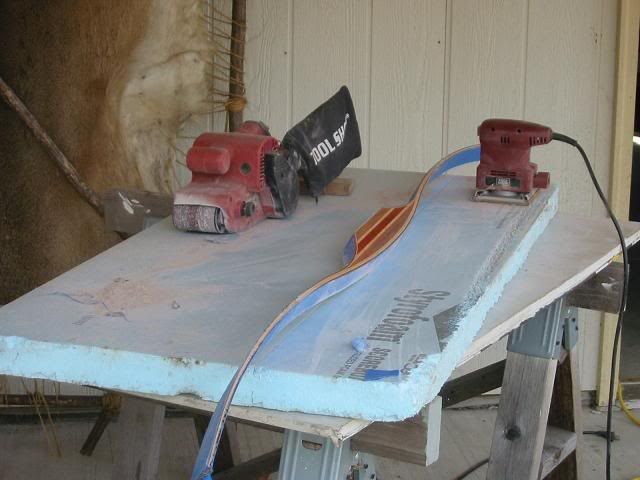
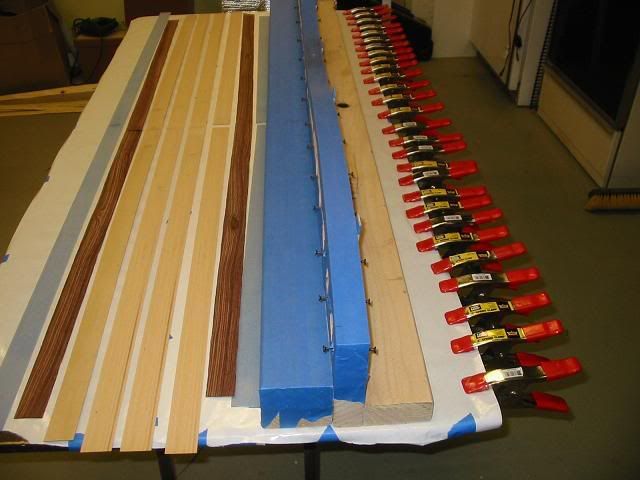
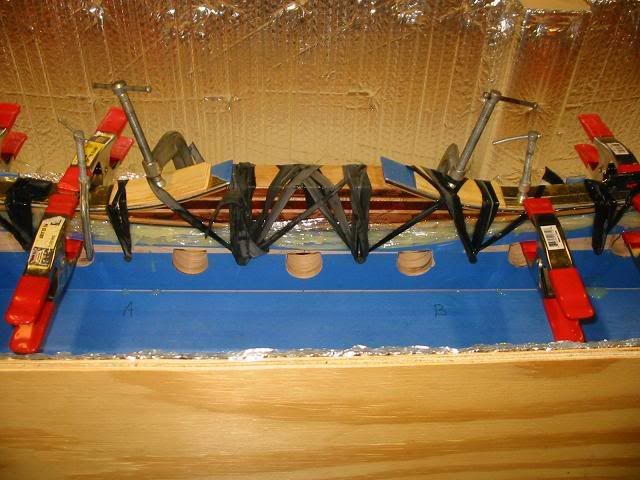
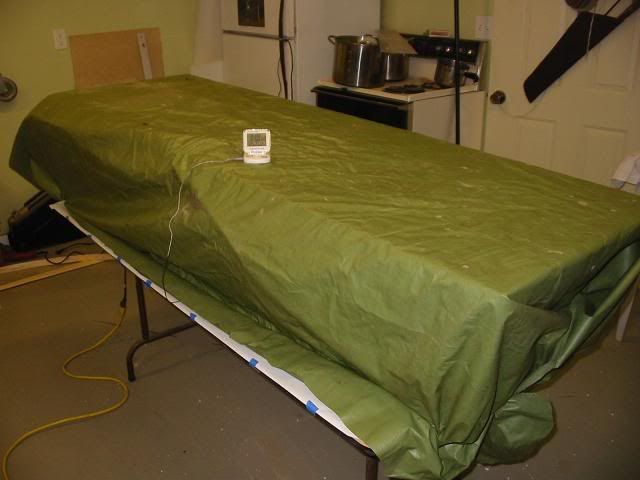
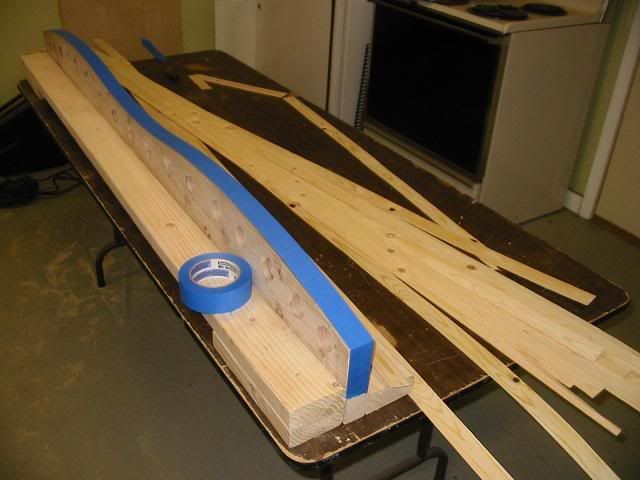
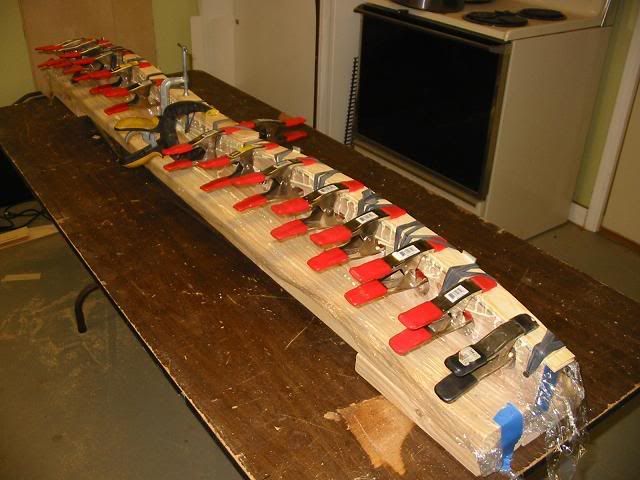
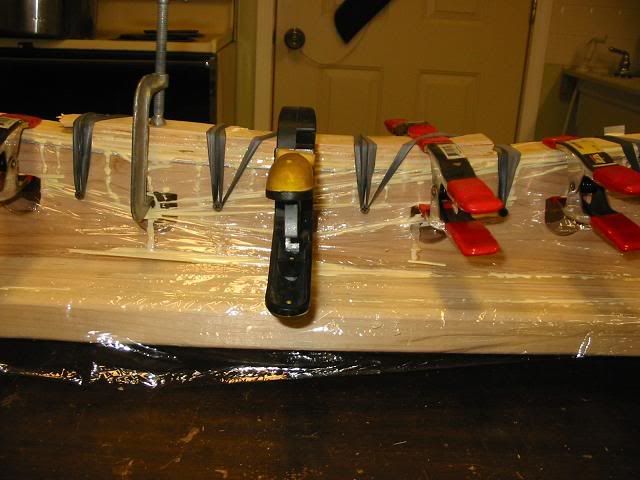
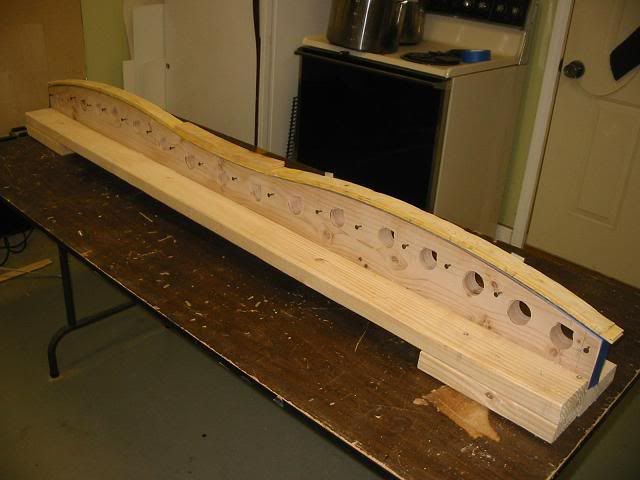
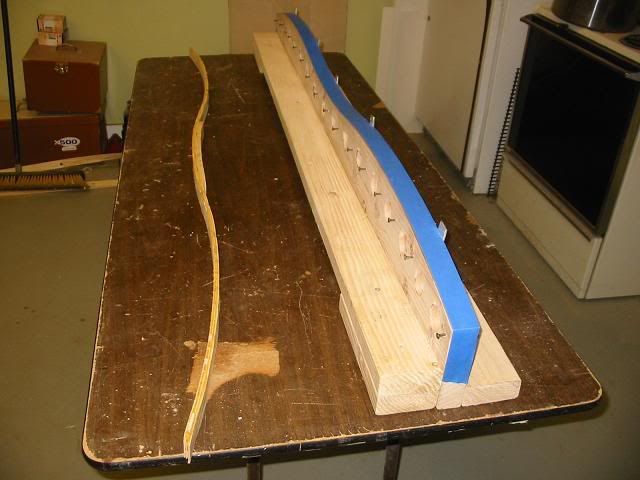
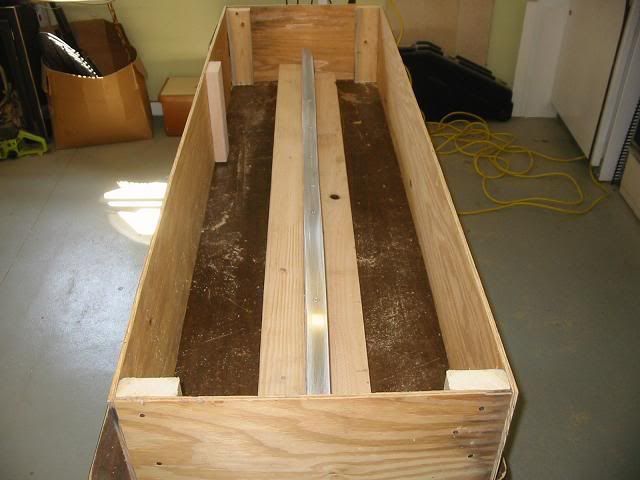
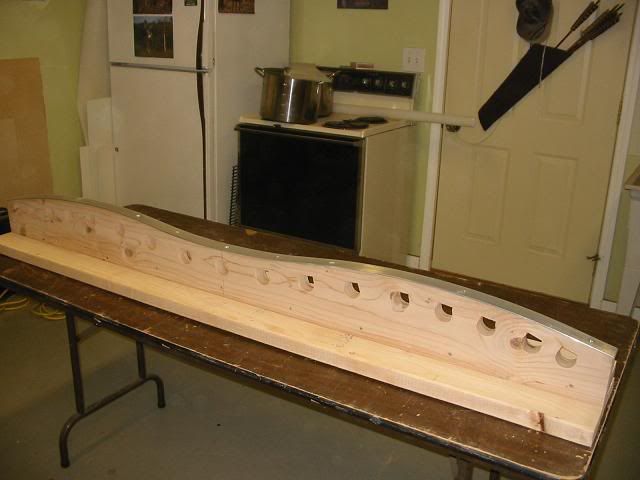
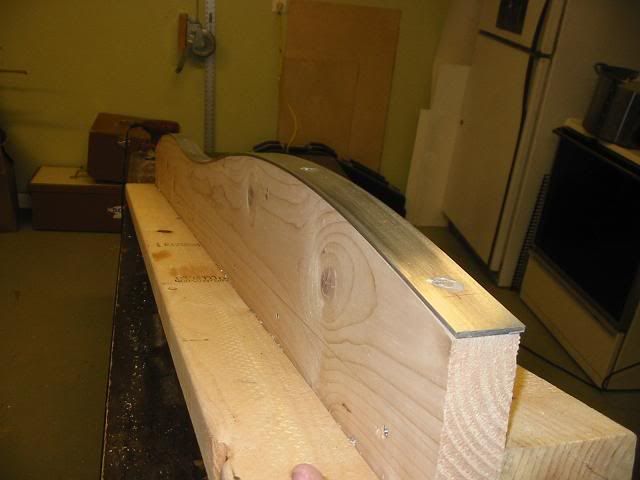
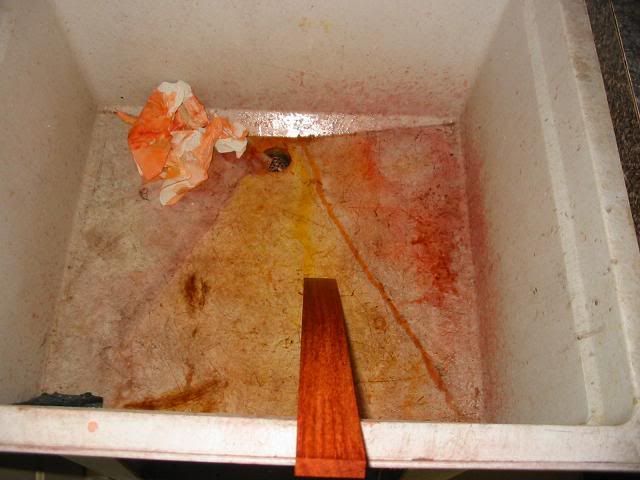
It was a day of ups and downs on the bow project. It took a solid hour to free the bow from the form. Removing the spring clamps was easy, The epoxy covered strips of inner tube proved to be a bit tougher. The form cleaned up easy because of all the tape I used to protect it.


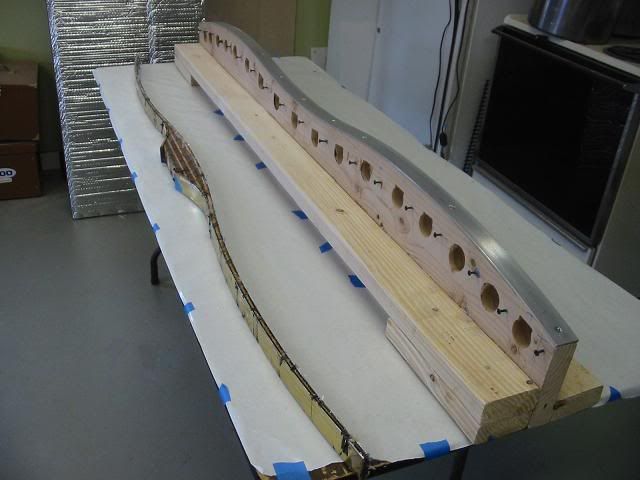
The bow was a little tougher. The extra epoxy was everywhere and held bits of the inner tube captive.


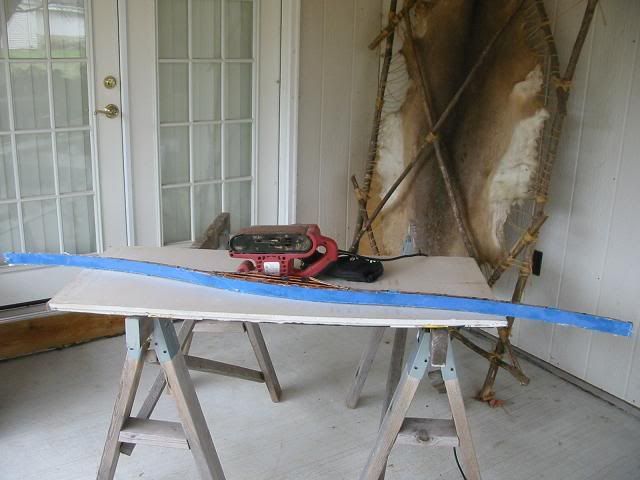
To save on a mess in the shop (and because it was a nice day) I took the bow out to the back patio behind my shop. The breeze would blow all that nasty fiberglass dust away.


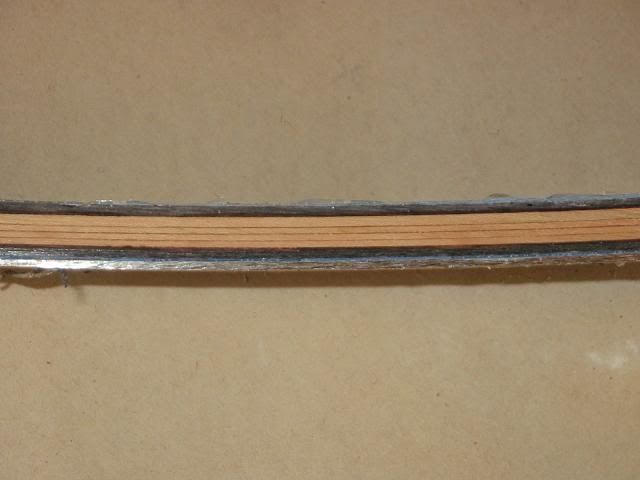
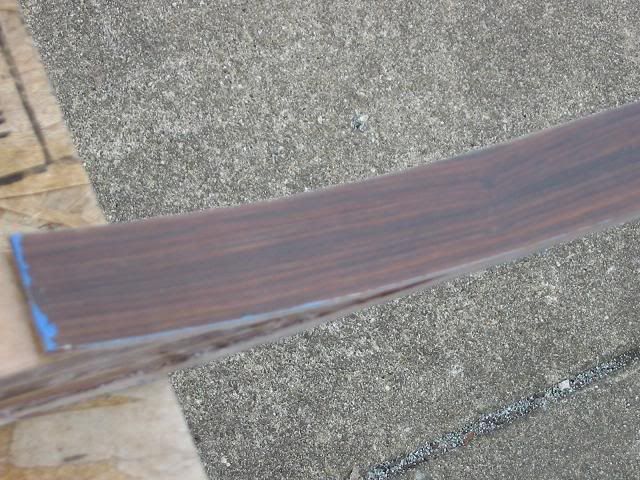
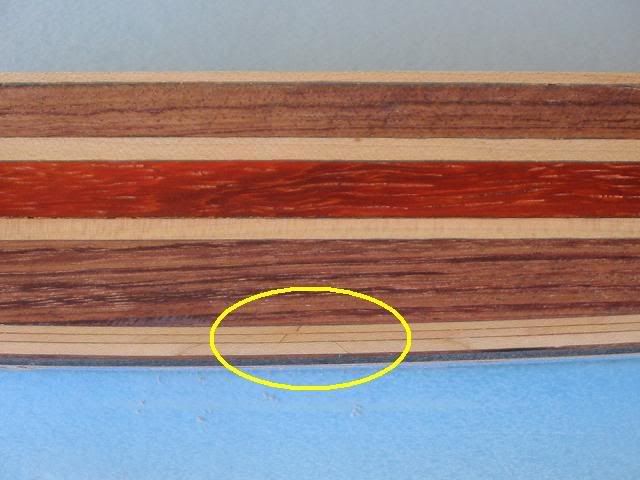
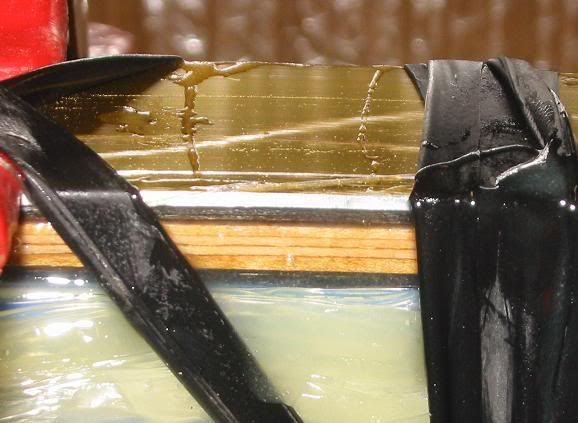
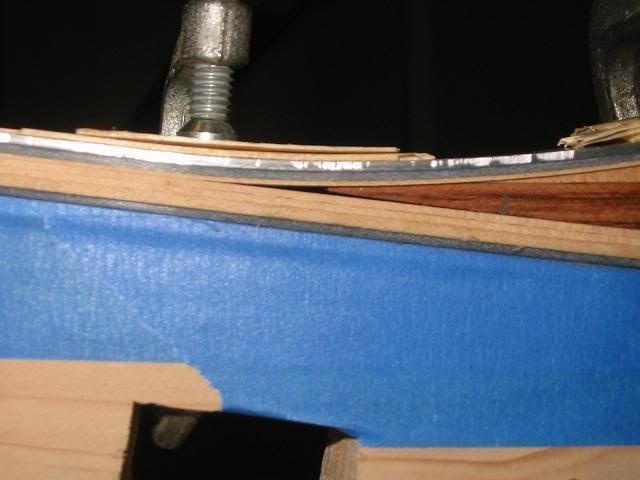
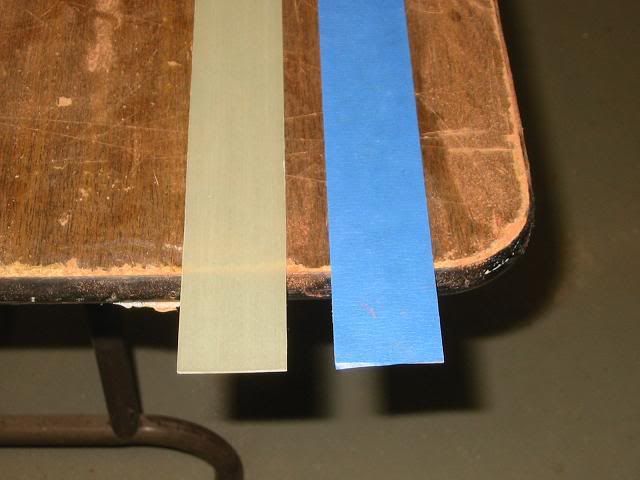
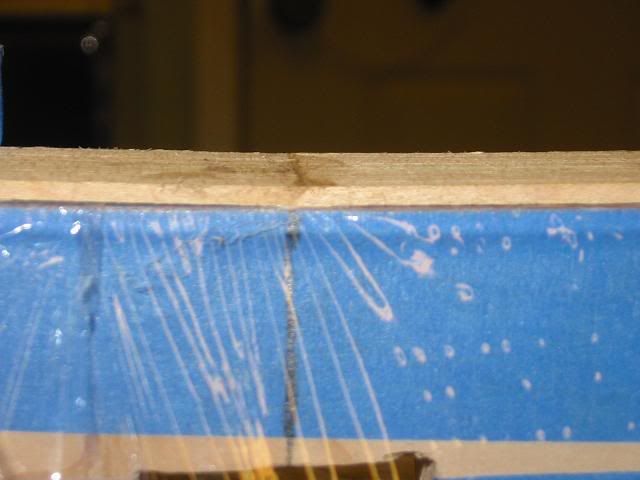
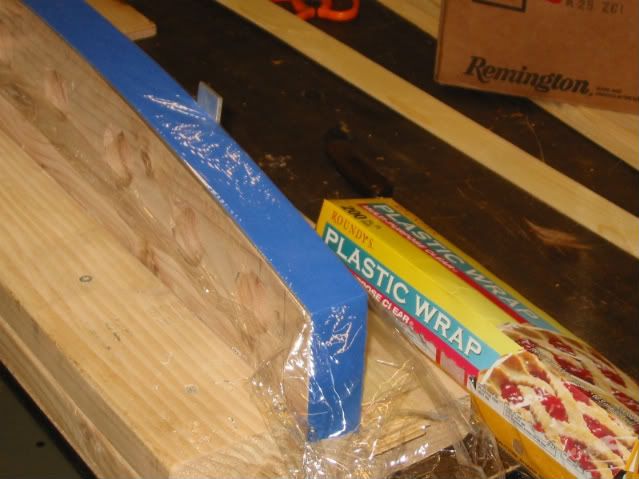
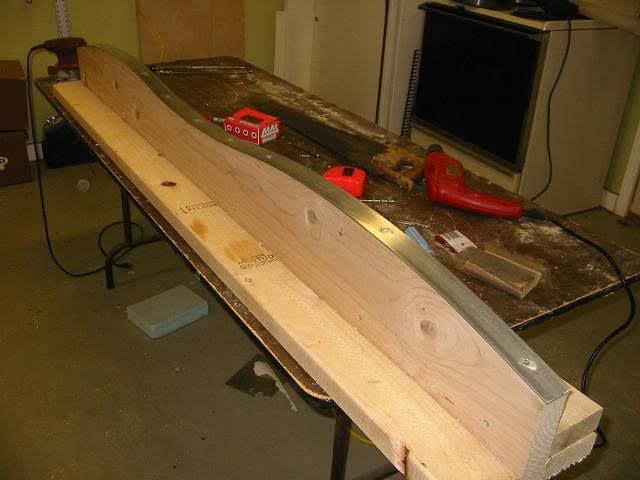
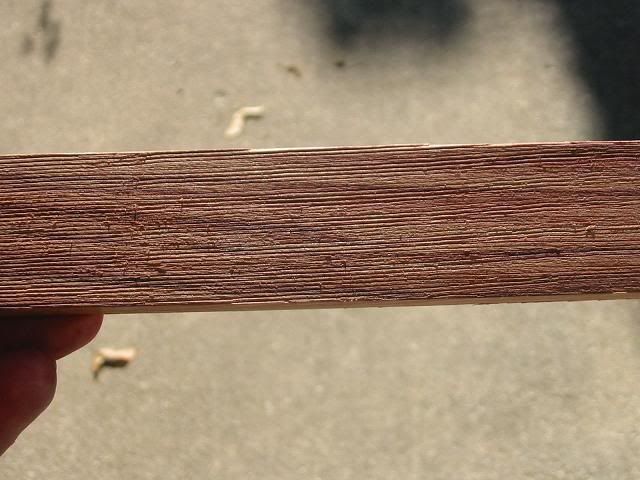
I learned that I need to place a layer of plastic wrap between the last layer of glass and the aluminum pressure strip. I didn't do that with this bow and needed to sand away the excess epoxy to free it from the bow. This also gave me my first look at the glue lines between the layers of wood.


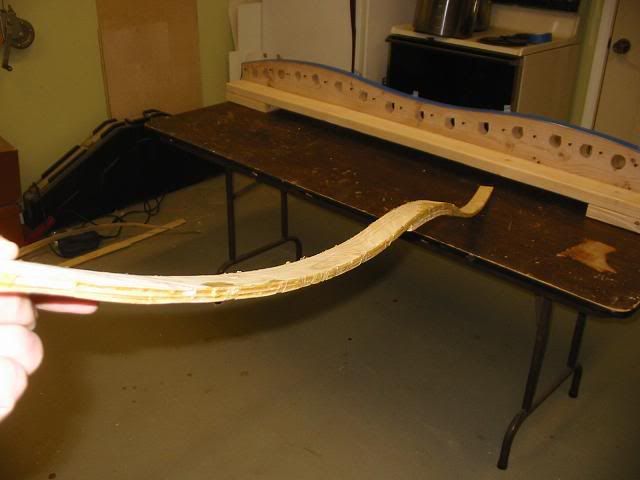
after sanding both sides I could pry away the aluminum pressure strip.


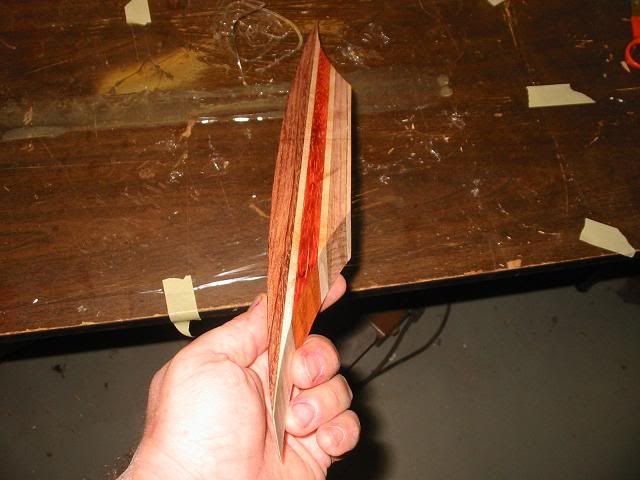
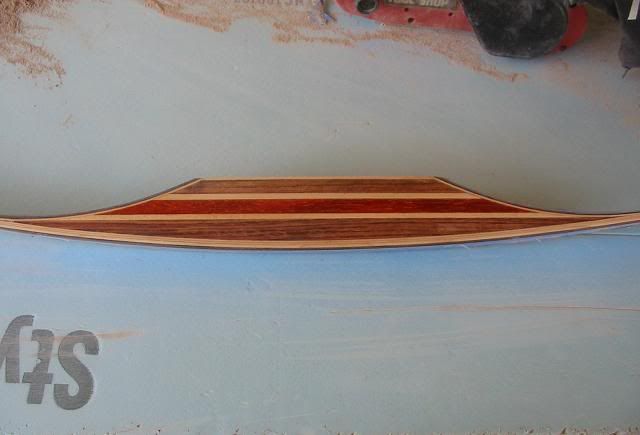
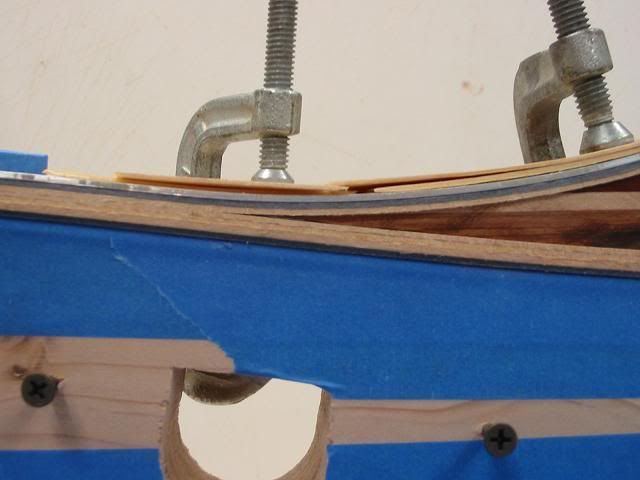
Then I just had to peel away the tape to see how the Kingwood looked under the clear glass.
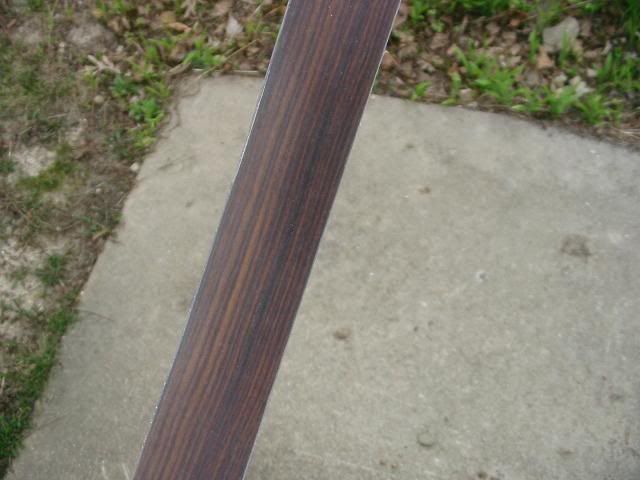


And the other limb.


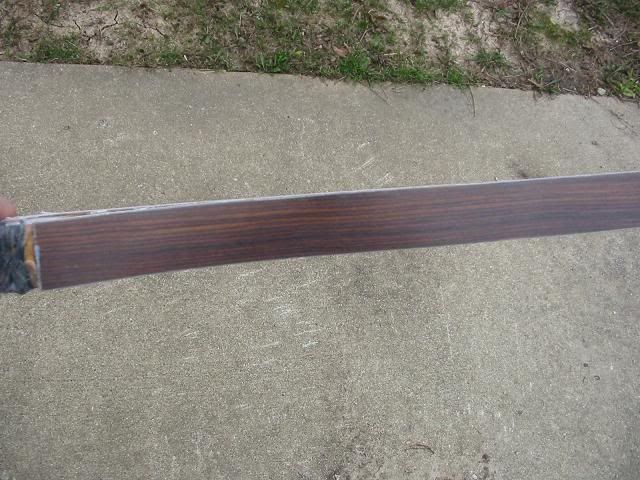
and finally the back of the bow. Everything looked good.


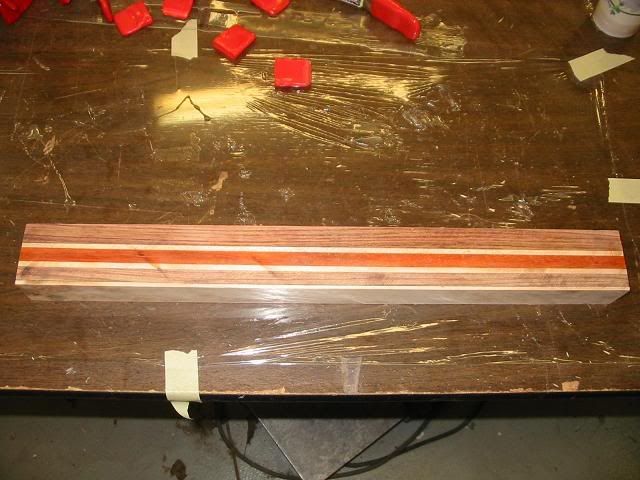
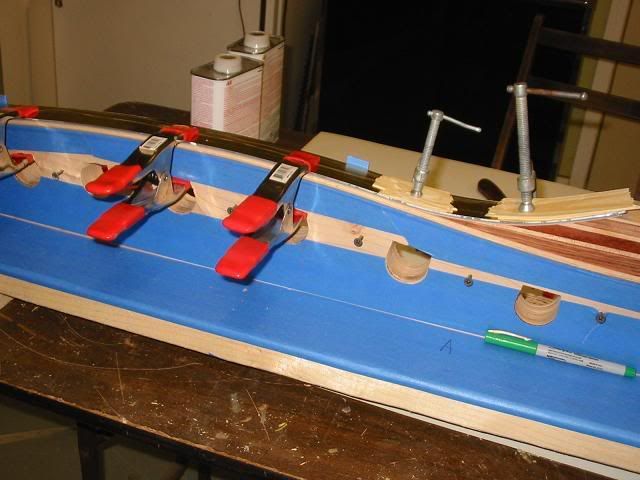
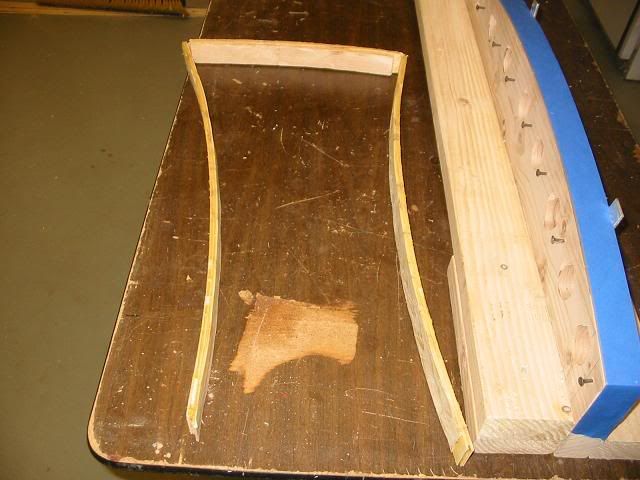
Then I worked on the riser. there was a lot of epoxy to remove.


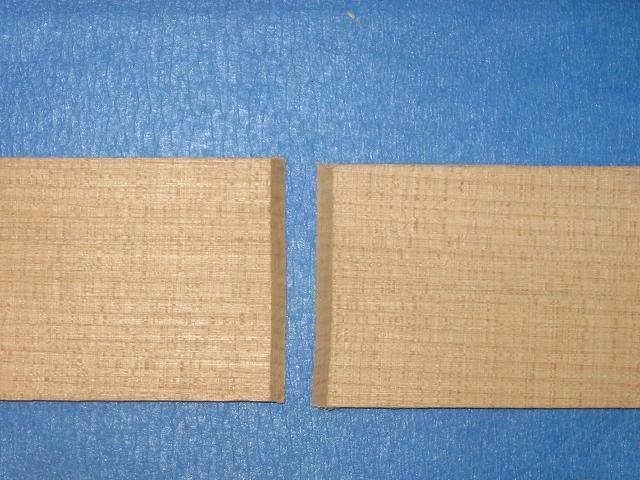
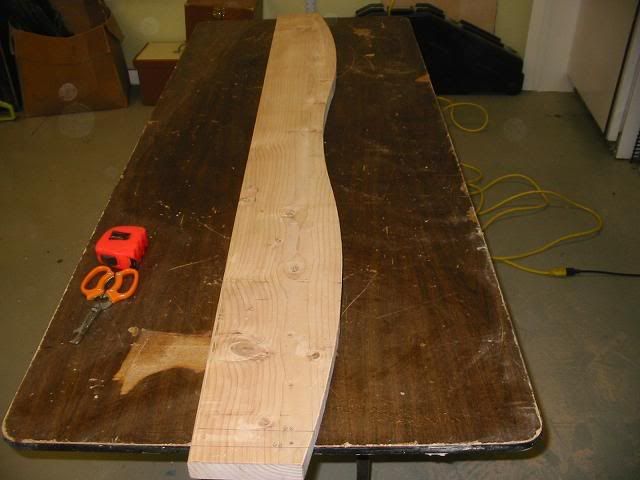
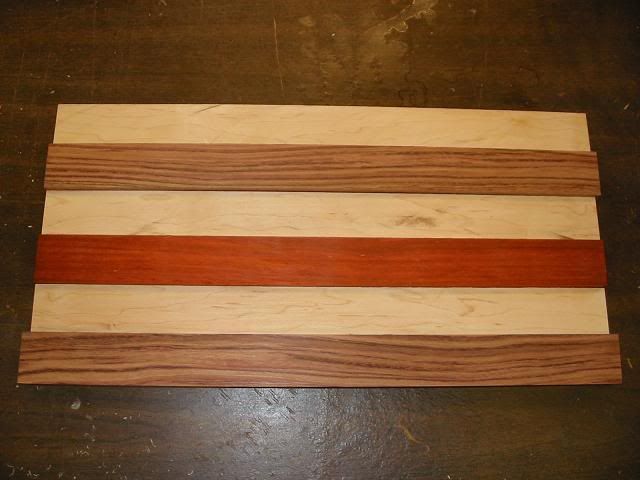
The risers looks good and so do the skive cuts that joined the strips of maple


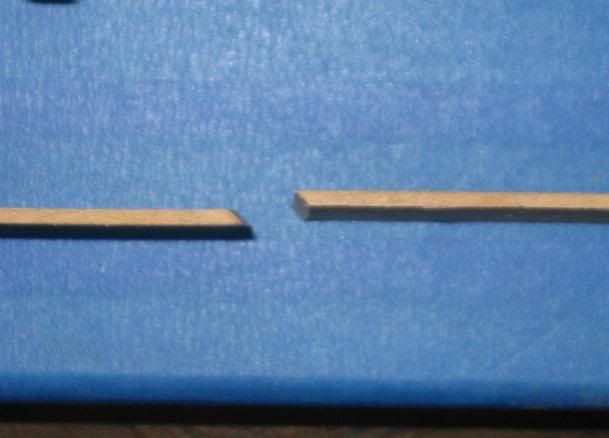
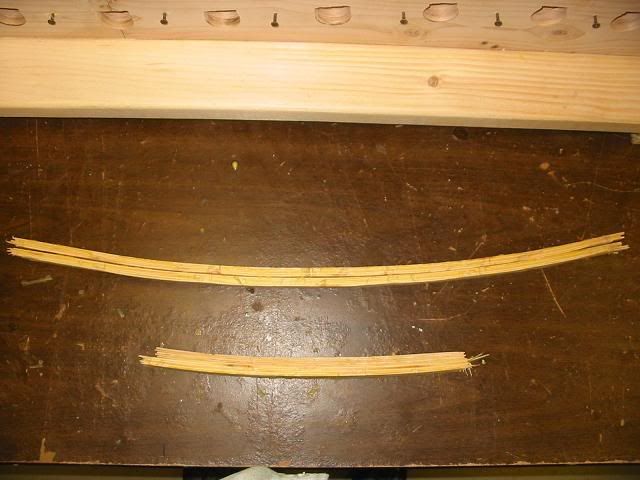
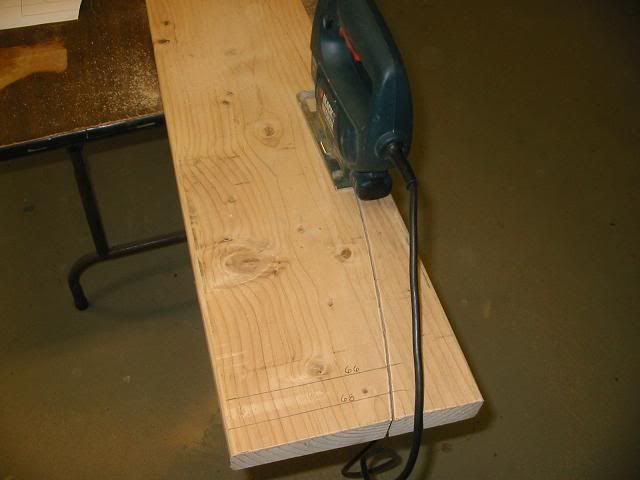
I then made a line on each end of the limbs that was 34 niches from the center point of the bow. (68 inches overall length) I used a fine tooth hacksaw to cut the ends off.


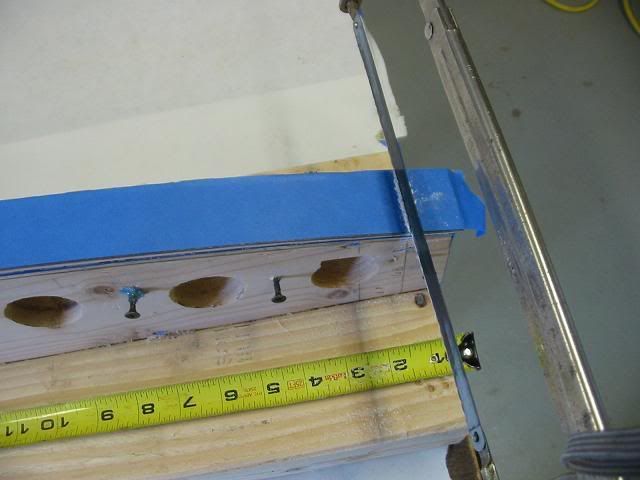
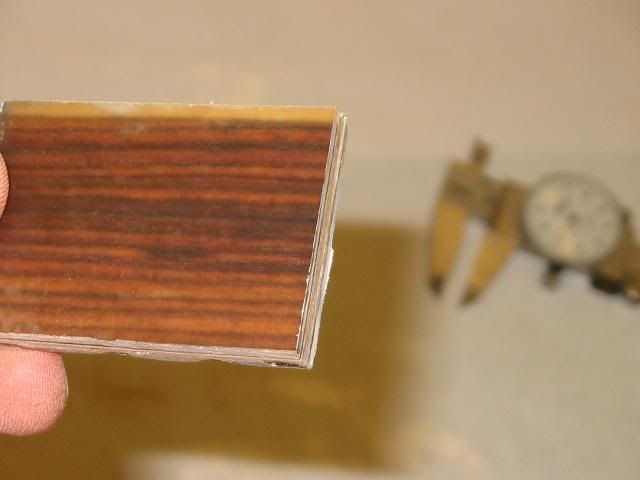
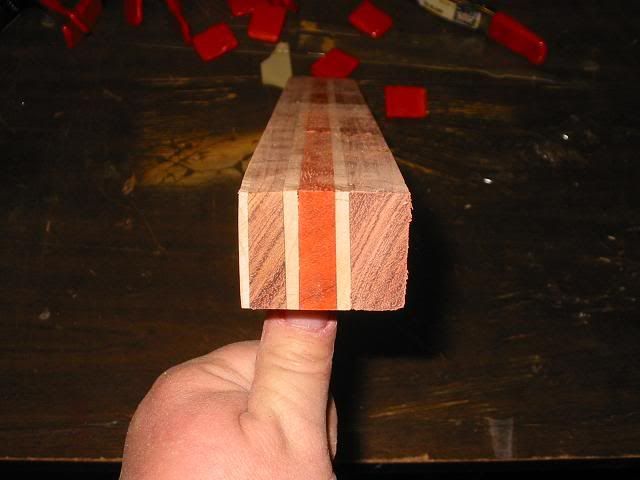
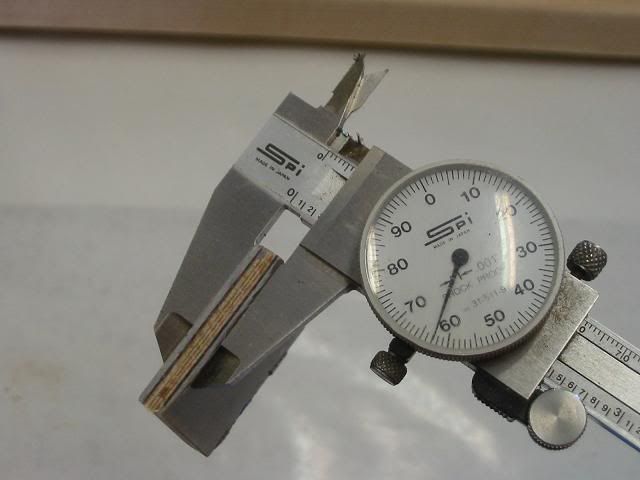
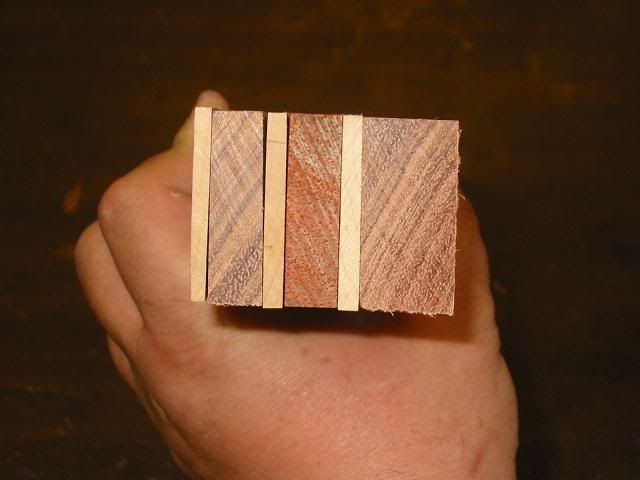
Both ends measured the same thickness.


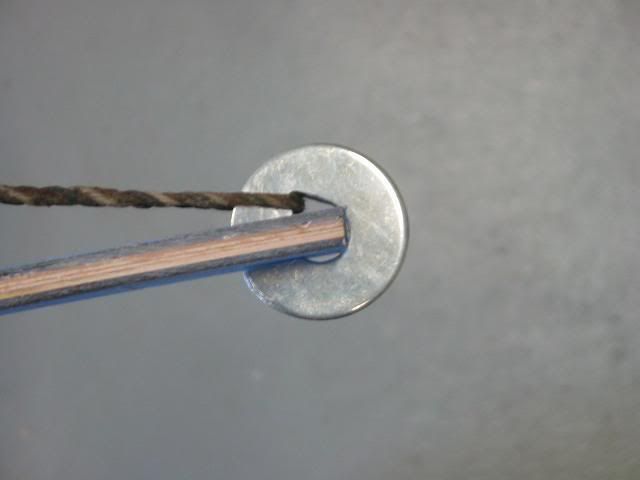
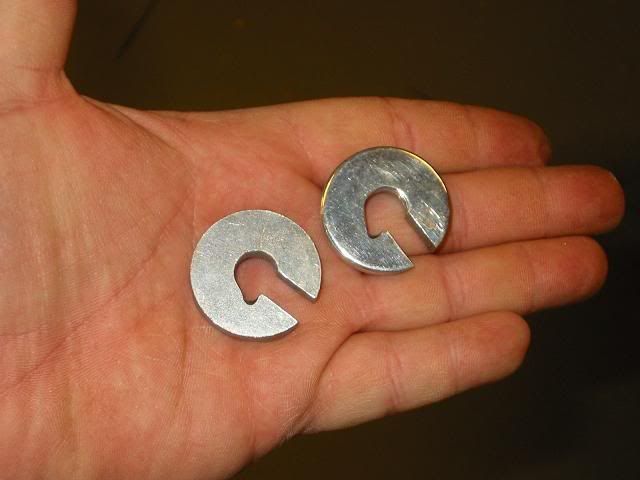
Then I used the washers to string the bow before I cut the string grooves.


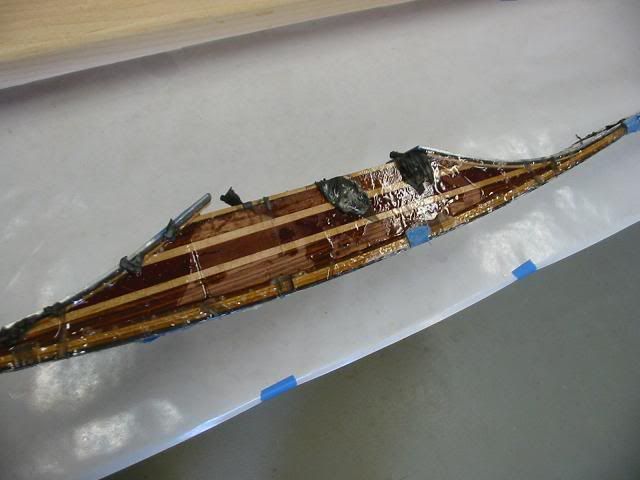
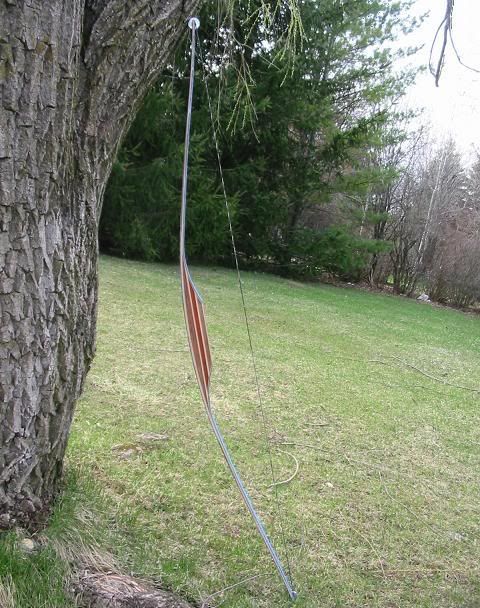
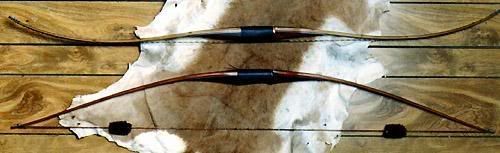
Here is is strung but with a bow string that is too long so the brace height is only about 5 inches. I used the string from my longbow. It is the only string I have for that bow. (that is an important point that will be realized a bit later.


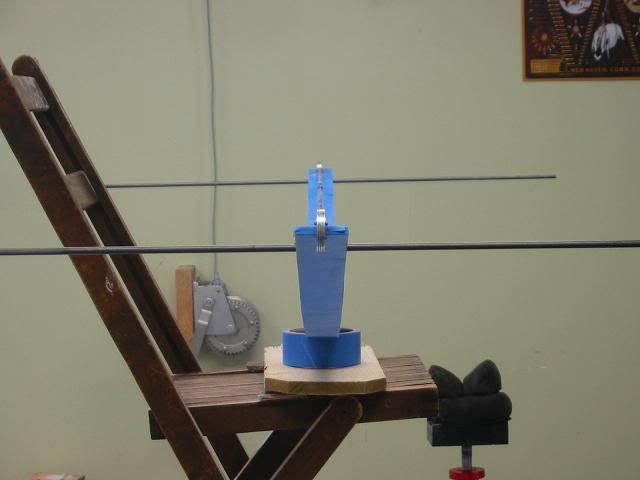
To check for limb twist, I wanted to look at more than just saw cuts at the ends of each limb so I took a carbon fiber shaft and taped it in place on each limb. I made sure they were at 90 degrees to the limb.


With the washers in the measured center of the limbs, there looks to be no twist in the limbs.


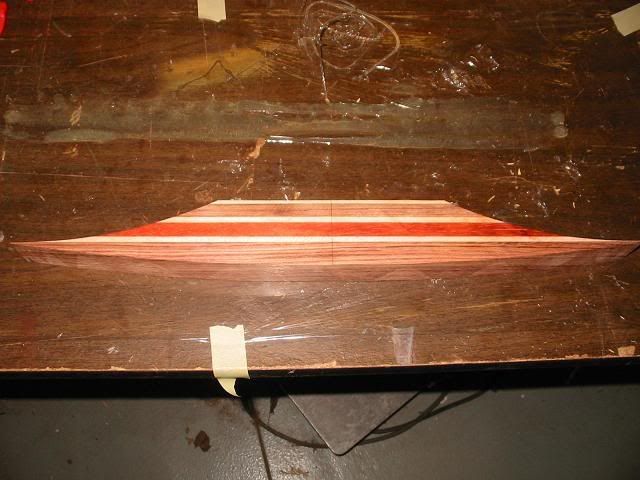
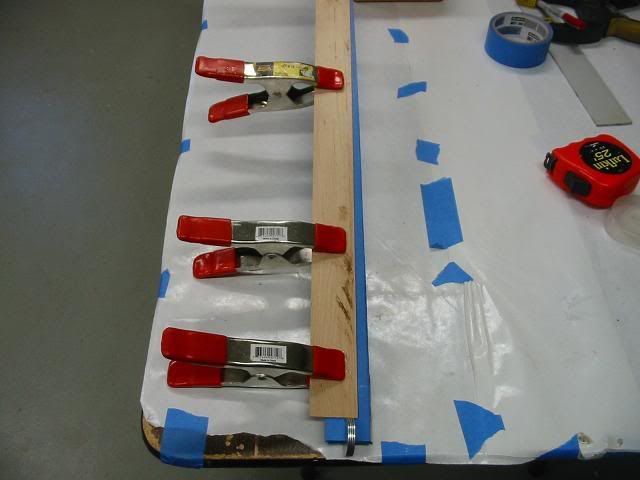
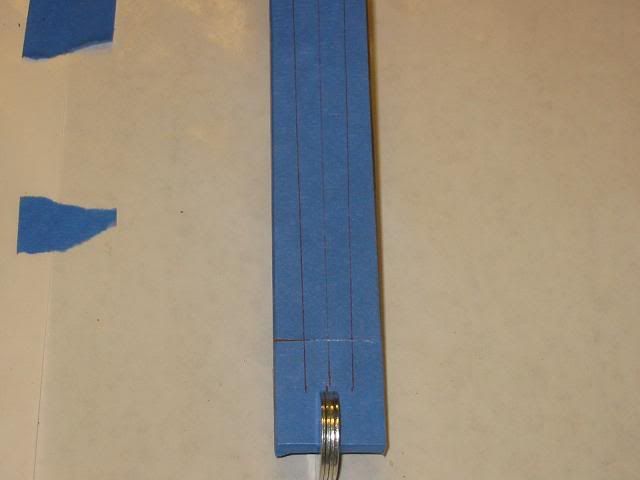
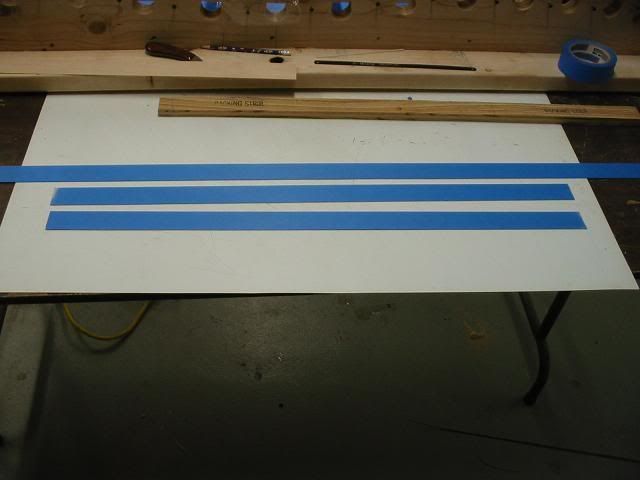
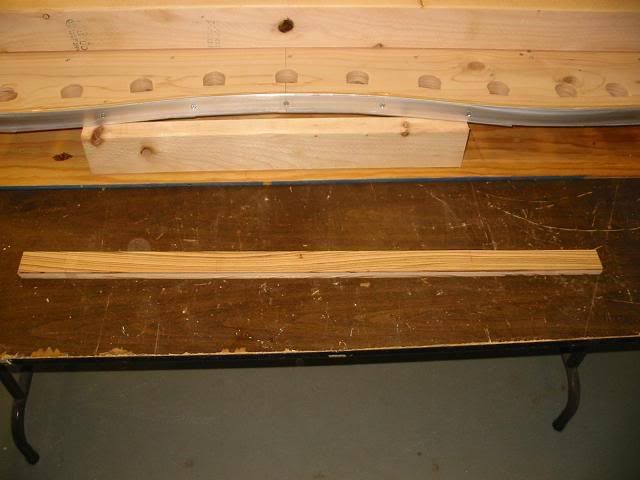
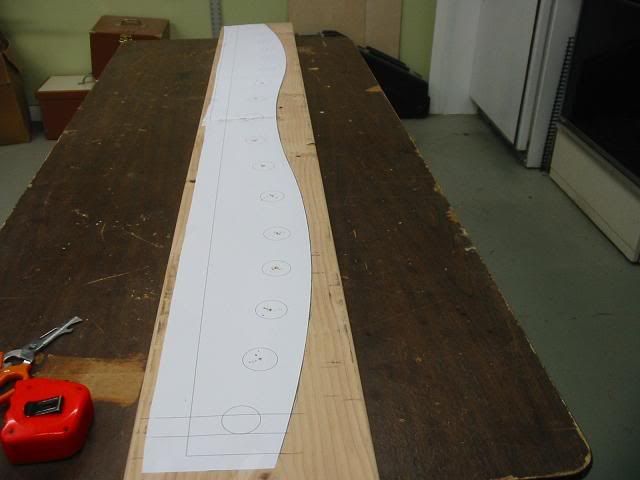
I marked the centerline of the bow along the entire length and used a strip of wood to mark a straight line for the limb taper toward the string nocks.


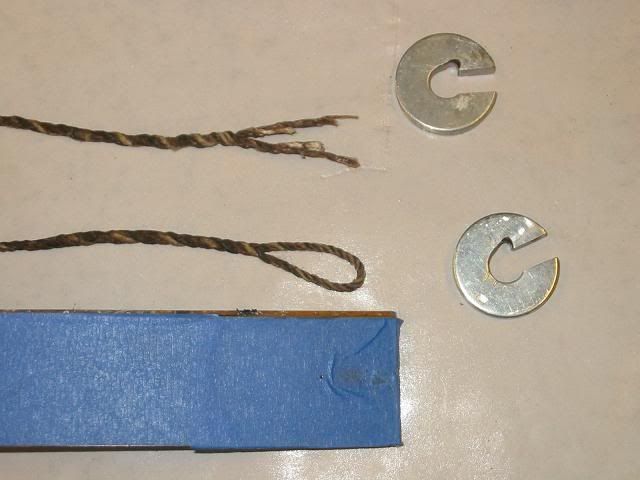
Just as I was marking the last line on the other limb, all hell broke loose, Something whacked me in the finger and the bow jumped up off the table. When I figured out what it was, I had to search high and low for both washers. The bow string (my only sting for my bow) had broke. My guess is that I left too sharp an edge on the inside of the groove and it cut through the string. Now I have no string for either bow. Time to scramble and locate a 64 inch string for my bow and a 63 inch string for the new bow.


287
Archery / Longbow Build along (Page 2) (Part 9-22)
« on: April 18, 2008, 06:57:06 PM »
So, enough waiting already. Time to glue this bow up. I promised a local grade school I would give them a few hours on Friday so I took the whole day off and worked on the bow in the afternoon.

I laid out everything I needed since the dry run a few days ago. Then I put both quart containers of the epoxy in a basin of hot water to warm them up a bit.


Next, I cleaned all the wood and glass surfaces and laid them in the order in which I would glue them.


1. is .050 clear glass

2. is .020 kingwood vernier

3. is .090 thick hard maple taper (two pieces glued together to make one long piece)

4 and 5.  is .065 thick hard maple taper (two pieces glued together to make one long piece)

6. is a piece of hard maple .060 parallel from the piece of wood my Dad cut. (two pieces glued together to make one long piece)

7. is .020 kingwood vernier

8. is .050 clear glass

Missing from the picture is the riser.


Fast forward to a completed glue up with the warmed epoxy. Due to the mess and the fact that I was working alone, I did not slip out of my sticky rubber gloves to take pictures along the way. What a slippery mess to work with. I used a combination of spring clamps and rubber inner tube strips to compress all the layers. I had more C-clamps at the center (on the riser) but I took them off once I realized that they stuck up higher than the sides of the box and the cover would not lay flat. So much for a complete dry run. I should have tried the lid of the box also. Oh well. live and learn.


Here is a close up of all the layers and all the extra glue that oozed out. I also learned that I used too much glue. I think I could have built two bows with what came out from between the seams. Once again. Live and learn. The gold colored layer on the top is a strip of aluminum that will help spread out the load from the clamps. I was the old track from a shower door that I cut into two strips for this project.


Here is the oven box doing it's job of keeping the bow at around 160F. I will unplug it before I go to bed and let it slowly cool down over night.


288
Archery / Re: Longbow Build along
« on: April 18, 2008, 06:55:48 PM »
I am starting page two in an effort to be kind to those using dial up.

289
Archery / Longbow Build along "Part 8"
« on: April 15, 2008, 08:00:57 PM »
While events in my life right now limit my time required to do the glue up and monitor the heat box, I do get a moment here and there to mess around with the bow project. I did a dry run and found something I never thought through (Which is the point of a dry run)


While the riser fits great on the empty form, adding the strip of fiberglass backing, four tapered laminations and the fiberglass face caused the fade-outs to lit poorly. I did not factor in the tapering of the laminations as they work away from the center of the riser. I discovered a gap at the fade-out area. I felt this gap was larger than it should be and do not want a large amount of epoxy at this hinge point. I might just be over cautious but I want a better fit and a consistent glue line. The dark black area near the thinest part of the riser is what I am worried about.


I sanded down the riser until it fit better.


I also made some tillering attachments that will slide on the end of the un-shaped limbs before I taper the sides and make the string groves. they are made from 4large washers that I epoxied together and cut notches in


I should be able to glue the bow together in a few days.

290
General Discussion / Raffle for the Wisconsin Bowhunters Museum
« on: April 11, 2008, 06:40:46 AM »
Please help out this worthy cause and be entered in the drawing for these great prizes.

Guided 5-Day Rut Bow hunt in Buffalo County

Mathews DXT Bow Donated by Wade Jeske/Lena Swamp Archery

Carved Moose Antler Donated by Gordy Bently

Heritage Arrow Created by Bill McCrary

Muskrat Fur "Stroller" Jacket Donated by Jodi & Greg Martin (size small)

To buy tickets, you can call Larry Wiffen at 414-771-6425 or Brian Tessmann at 262-544-6573 or the WBH office at 715-823-4670. Need not be present to win

This is the message from Stan and Carolyn. They are the ones who donated the hunt.

"We are donating a bow hunt on our farm in Buffalo County. for the 2008 or 2009 for the WBH heritage Fund. This is to keep the Bowhunting museum going. Its for 5 days, which includes meals and lodging. on our 240 acre Farm in Lower Buffalo Ct. between Fountain City and Arcadia in Cross township, We have taken quite a few P&Y bucks, The only drawback is we are in a earn a buck area, So you have to get your doe, before you shoot a buck. We have taken some l50s and lower bucks, Not a buck behind every tree but they are here. Its $5.00 per ticket or 3 for $10.00 The drawing is at the WBH Broadhead shoot in Sept. In New Lisbon"

Stan and Carolyn

http://www.wbhassoc.com/Museum.htm


291
Archery / Longbow Build along "Part 7"
« on: April 09, 2008, 08:27:07 PM »
I didn't have much time to work on the bow today but I did get the strips of fiberglass cleaned with alcohol and then I put a layer of tape over the shiny surface to protect it from scratches and epoxy during the build up. The one on the left is yet to be taped.


On the back side of the bow (towards the archer) I need two pieces of fiberglass so I cut one of the long strips in half after I taped it


Then I beveled the wood laminations so that the glue seam would not be so obvious.


Then I glued the bevels together to make one long piece.


At this point, I am ready to glue up the bow. I hope to be able to do it next week.

292
Archery / Longbow Build along "Part 6"
« on: April 09, 2008, 05:57:45 AM »
I took the advice of some folks and insulated the inside of the oven box. I bought a roll of insulation that is made from a double layer of bubble wrap with heavy duty foil on both faces. It is just under a 1/4 inch thick and lightweight.


I used a staple gun to attach it to the inside walls of the box and to the under side of the box cover.


I then added two additional light bulb bases to the boards that I had made up earlier. I used 100 watt bulbs in the center two bases so now I have (4) 150 watt bulbs and (2) 100 watt bulbs.


After one hours, the temp had risen to my goal temp of 160F. I felt the outside of the box in several locations and could not feel any heat escaping through the walls or lid.


After 2 hours, the temp had risen above my goal but I consider this a good thing since I will now be able to crack the lid a bit or perhaps unscrew one bulb to control the temp.


The oven box is finished and ready for the big day.

[/quote]


I have already had someone approach me and ask that when I finish my son's bow, if I would glue up a bow for them and send it to them right off the form. They want to take it from there and complete the shaping, tillering, finishing, etc. I think it will be neat to see someone else finish a bow that comes off this form.


293
Archery / Longbow Build along "Part 5"
« on: April 08, 2008, 08:20:36 AM »
In order to evaluate the bow form, I built a mock up. I bought a pine, 2 x 6 and cut it into strips that were .065 thick.


Before gluing the strips together, I protected the form with two layers of tape. It will be easier to remove and replace the tape then it will be to try and chip away any excess glue from the form.


Next, I covered the surfaces of the form with plastic wrap to keep it clean.


I used yellow wood glue for the mock up. It did not require the oven box. Once all the layers were covered in glue, I used clamps and strips of rubber inner tube to compress the layers.


In the center section (where the riser will be) I added a few extra strips.


After 24 hours, I removed the clamps and the plastic wrap. There was no "Spring back" or relaxing of the wood strips. I then took the mock up and reversed it on the form to see if it was symmetrical and it fit the form equally in either orientation.


I checked for twists in the limbs and found none.


I then placed the riser against my chest and grabbed both limb tips and began to flex the bow. Since I did not have any fade outs and the ridged glue does not like to flex (and the pine had many knots) both limbs broke


This allowed me to nest the limbs and look for any twists or differences between the two. Everything looked good.


I think all is ready to assemble Josh's bow. Now I just need to find the time to actually do it. Since I will want to baby sit the oven box for the 8 hours that it will cook, It's going to have to wait until I have a free weekend and those are hard to come by.

294
Archery / Longbow Build along "Part 4"
« on: April 07, 2008, 05:49:45 AM »
On Sat. Morning, I built the oven box for the bow form. I will spare you the details since it's just a box made from scrap plywood that was left over from another project. I will say that It is 12 inches high and 22 inches wide and 74 inches long. By removing 6 screws at each end of the box, I can reduce the box to four individual panels for easy storage.

You will also notice that the box has neither a top or bottom. The reason for not having a bottom is so that I can bring the box to the form that will be covered in oozing epoxy and many clamps (creating a challenge to move) I would rather bring the box to the form.


With the box complete, I assembled the heat source that I will use to raise the inside temp of the box to 160F. A trip to the Home Depot for the supplies ran me about $30.


The first step was to get rid of those pesky warning labels. Nobody reads them any way. The extension cord company knows I am not going to read the label in English so why would they expect me to read it in Spanish? I hope the extension cord labels are not like mattress labels. I would have to spend time behind bars for removing them.


Once I cut the extension cord into bits, I wired the light bulb bases together in series so that one plug would power them all.


A quick test revealed that I had had paid attention in shop class.


I placed the form between the two light bulb boards and brought the box to the form. My Son will need to help with this part as the box is a bit long to handle alone. Everything fits nicely.


The cover of the box will be an old closet door from our last house. It is hollow so it is light enough to move around and it was free.


I drilled a hole in the door and inserted the probe of a thermometer. This way, I can keep tabs on the temp inside the box without opening it and letting the heat escape. My wife won't be cooking a turkey for a few months anyway.


After two hours with the bulbs on, the temp never got above 135F. I will replace the 100 watt bulbs with 150 watt bulbs and add two additional bulbs to the boards

[/quote]

The next test will include covering the oven box with a canvas to trap the heat better. I think 2 extra bulbs should do the trick.

The next sep will be to make a test bow out of scrap material so I get the feel for the assembly process and so that I can check the glued up trial piece for any warps that I will be able to correct before wrecking a bunch of expensive woods and fiberglass. It is a piece of mind exercise.

295
Archery / Longbow Build along "Part 3"
« on: April 04, 2008, 09:19:36 PM »
I spent some time today, making the clamp holes in the form. When I assemble the bow, I plan to use spring clamps to compress all the layers of wood, fiberglass and epoxy together.

I drilled big round holes and then used a jig saw to square up the side of the hole closest to the top surface. This will give the clamps a little more room.


I will use one clamp on each side of the limb. Like this.


I also got a package in the mail today from Old Master Crafter of Waukegan,  IL. I ordered the wood laminations a few days ago and these things showed up a lot faster than I was told they would. (Great Service) It does not look like much for about $60 but what it is, is 6 taper ground action wood strips that are .065" thin on one end that taper at .001" per inch of length. The strips are 36 inches long and 1 1/2 inches wide. they came protected by two nice looking strips of Zebra wood. I will use them for knife handles at a later date.


I placed the thick end of one piece next to the thin end of another so you can see the taper.


Each limb will get three of these tapers and one strip of parallel thickness Hard rock Maple that is from the piece of wood my Father cut so many years ago. This is the same piece of wood that I used in the riser.

On the front and back of each limb will be a thin layer of Kingwood and then clear fiberglass. All of this will be assembled with the same epoxy I used to make the riser but first I need to assemble an oven box.

296
Archery / Longbow Build along "Part 2"
« on: April 03, 2008, 05:33:49 AM »
Before I can go any farther with Josh's bow, I need to build the form that the bow will be glued together on. There are a lot of ways to go about this and forms can be made many ways but I chose a way that seemed easy to me.

I bought a nice straight 2 x 10 and traced the form that I came up with onto the wood.


Then cut it out with a jig saw.


I then went over the entire length of the curve with a square to make sure there were no twists in the form. Any irregularities were taken out by sanding.

In order to keep the form straight over time and in the heat of the oven box, I screwed a few 2x4's along both sides. They will also act as feet to keep the form from tipping over. Next, I covered the entire curve with a piece of 1/8th inch thick by 1 1/2 wide aluminum strip. This will make the the curve a much better surface to build the laminations on and it will be more repeatable should I want to build more bows from this form. This form will build bows up to 70 inches in length. This bow will be a 66 inch model.


I need to drill a bunch of clamp holes along the curve for the spring clamps but that will have to wait for another day. 

297
Archery / Longbow Build along (Page 1) (Part 1-8)
« on: April 03, 2008, 05:33:19 AM »
I am going to show the steps in making this bow for my son. I am not an expert by any stretch. This will be a build along sort of thread but I must warn you that this will be slow going. I have many projects in the works with much stricter time lines than finishing this bow for my son so there will be periods of inactivity. Thats just real life.

This bow will be a reflex/deflex Long bow. It is a hybrid combination of a longbow and a recurve. Longbows are typically straight when unstrung and recurves are still curved even when unstrung. This bow will look sort of like a recurve while unstrung and like a longbows when strung.

Here is a pic I stole off the web to give you an idea of what I am going for.


The woods I am using for Josh's bow are the same ones I use to make knife handles. For the most part, they are South American hardwoods. The riser will be made from Bubinga, Bloodwood and good old American hard rock maple from a tree my Dad cut many years ago. Sort of a legacy piece of wood, cut by my Dad, Made into a bow by me and finally used by my son. I will also use some of the Maple in the limbs.


this is the order in which I will stack the layers.


Most S.A. hardwoods have oils in them that make gluing difficult, so I use acetone to clean and degrease. Blood wood and purple hear are some of the oiliest. You can see the orange oil in the basin of the sink. It took a long time to clean that sink. I should have sprayed it with pam first.  :oops:


Once cleaned, I used a hacksaw blade as a scrapper to rough up all the gluing surfaces. Epoxy does not like smooth surfaces.


The glue I am using can be purchased at a number of bow building web sites. This is a two part epoxy that gets stronger if cured under a heated condition. This is important because if you leave the bow in a hot car on a sunny day, The glue had better have been cured at a high temp to keep the bow from de-laminating.


It mixes like any other epoxy.


Make sure to cover your work surfaces with wax paper or plastic wrap. It is hard to clean up any spills. Then simply butter both sides of the surfaces to make sure you have no dry spots that will later separate.


I use spring clamps because C-clams will get loose during the heating process when the glue oozes out. (trust me, there is a lot of oozing) :(  
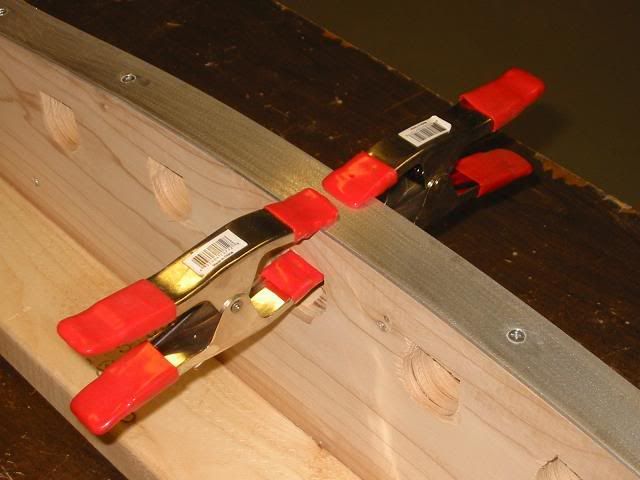
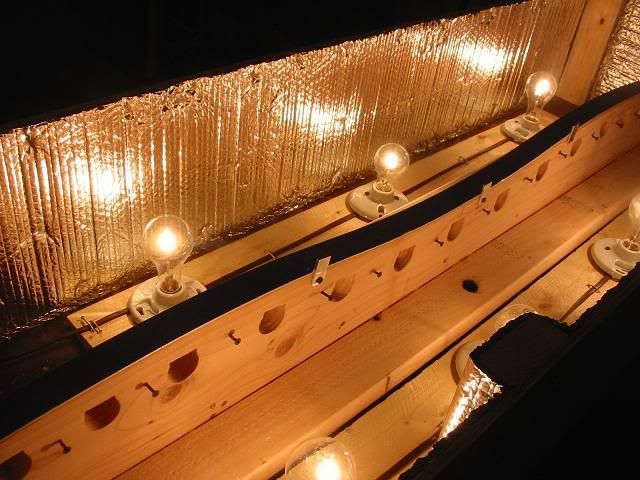
Spring clamps keep a constant pressure at all times.


I then take the riser and put it in a preheated oven. Bake for 8 hours at 180F until a nice golden brown and serve with a scoop of vanilla ice cream .    ::)

When it comes time to glue up the bow itself, I will build an oven box that is 6 feet long as the bow will not fit in the oven. I will heat this box with 100 watt light bulbs.

Fast forward 8 hours and a few more hours for a slow cool down period and the riser is all glued up. The rubber tips of the clamps need to be pried from the glue.


Next, I ran the block through my table saw to square it up and remove the excess glue.


Then I drew the riser pattern on the wood and cut it out with a band saw and sanded the fade outs on a drum sander.


This glue is a flexible epoxy. Normal hardware store epoxy would crack and break if bent like this.


Make sure to use only enough glue for the job at hand. A little goes a long way.


I now need to make the form that I will use to glue the bow on and I need to make the heat box. Like I said, this is going to be a slow moving project. I will post more progress as I get a chance to work on it.

298
Wisconsin General Events and Activities / 2008 Sports fest
« on: March 21, 2008, 12:36:05 PM »
Learn about this WI event that will benefit all hunters whether they be bowhunters, upland bird, Waterfowl, Firearms deer, bear or Turkey. This event is a fundraiser meant to protect ALL hunters against those that mean to end our traditions.

If you are interested in being ticket vendor or an individual interested in selling tickets, click the link to learn how you can help.

This event Takes place on August 15 and 16 at the Sunnyview Expo Center in Oshkosh, WI

http://www.wisportsfest.com/


299
General Discussion / New Hunting/fishing/sports show in SE WI
« on: February 28, 2008, 08:08:10 AM »
Held in Oconomowoc, WI. Lots to see. Speakers/seminars like
March 7, 8, 9th 2008
Olympia Resort
Oconomowoc, Wisconsin
Joe Bucher - Hunting Trophy Bucks the Bucher Way
Tammy Koenig - Blood trailing tactics
Doug Hoskins - Turkey calling tactics

http://wisconsinoutdoor.com/smf/index.php?topic=1219.0

300
Archery / Re: Project Bison
« on: February 28, 2008, 07:03:25 AM »
The hunter stopped by my house today to drop off some pictures of his bison and to show me the arrow (all 3 pieces of it) The broadhead was as sharp and as good as new.


As stated, the entire head came thru the far side but the arrow did not completely pass through and out of the bison.


When the hunter stopped by last night with the pictures, he also brought along a big bag of bison fillets and roasts and steaks and burger. He told me that after doing the math, it would take a year to eat all the bison even if he ate 2 pounds every day. On top of that, I processed a few deer for him this year. I think he is set for red meat for a while.

Pages: 1 ... 18 19 [20] 21 22 ... 26
Google
Web http://www.wisconsinoutdoor.com