Show Posts

This section allows you to view all posts made by this member. Note that you can only see posts made in areas you currently have access to.


Messages - Rancid Crabtree

Pages: 1 ... 4 5 [6] 7 8 ... 26
76
Outdoor Related Craft Projects / DIY pickup truck tonneau cover
« on: May 16, 2016, 07:04:23 AM »
Because we will be attending more and more sports shows , we need a bit more security in the long bed of our truck (8 foot bed). We looked at tonneau covers and didn't care for the fabric versions as they can be breached with a knife. Other versions did not do what we wanted and it seemed all came in Black and that is not an option as the items under that black cover in the heat of the sun would be cooked  in the incredible temperature that would be generated under a black cover. That heat would cook or bows and other gear.

So we opted to make a project out of it and make our own folding cover. It will be made from wood. We expect it to come in under $100, be about 50 pounds so one person can take it on and off and it will be the color of our choosing (a very light color). We may even decorate it our company logo. The frame will be pine and the cover will be 1/4" plywood. Everything will get two coats of raw wood primer and then 2 coats of paint in a color yet to be determined.


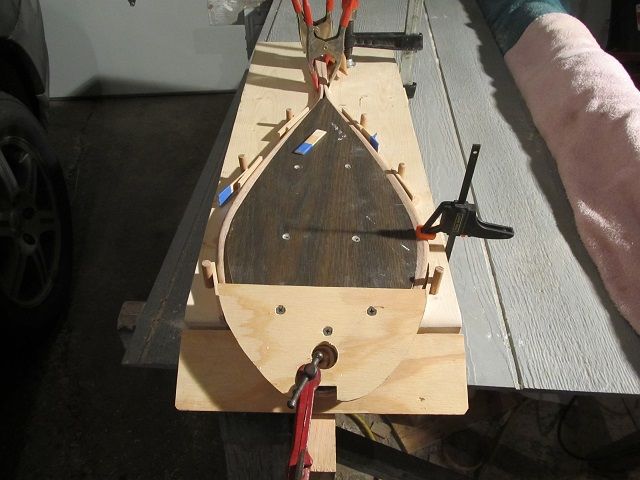
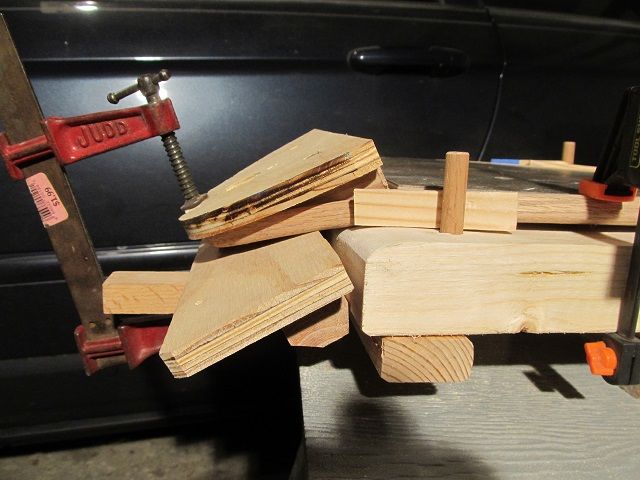
Until we began this project we were unaware that the bed of this truck actually tapers/narrows from front to back. We assumed it was a simple rectangle. The 3 sections of the cover will fold on themselves (3 hinges on each section) but would also be able to be opened individually as needed. Here are some pictures of the progress so far.


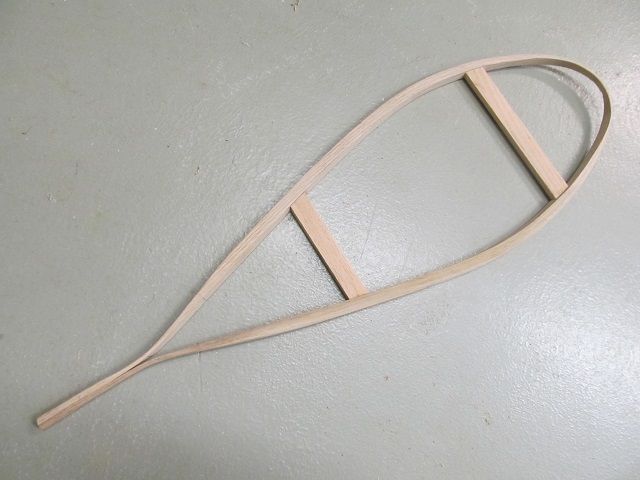
To match the curve of the tailgate we added a curved segment to the rear most section.


Construction is complete and its time to move onto the protecting it. 2 coats of Kilz primer.


The top side will be Behr Exterior "Silver Screen" in semi gloss.


But first, the underside (side nobody sees) will get two coats of exterior semi gloss in a camo green from a past project.


While the coats of paint dry, time to figure out how to project our logo on the cover so it can be painted on the top side.

The painting is complete so its time to fill in the blank slate


We want to paint our Black Claw logo on the rear-most section of the bed cover. But we may also add the Stay Sharp logo to one of the other sections.


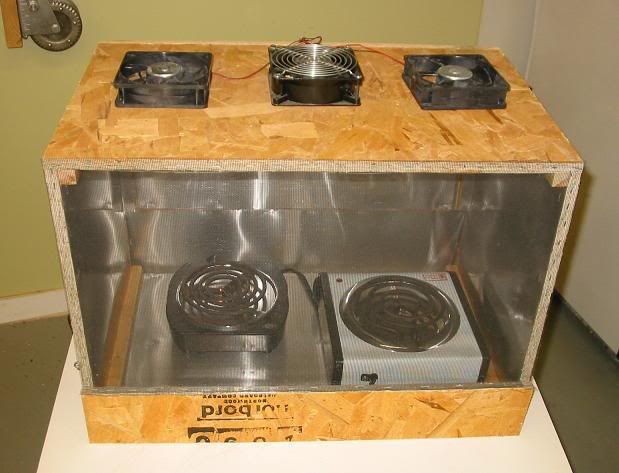
To do this we need to project the Black Claw logo as a very large image (5 feet across), Since we don't have a projector we will make our own laptop projector. A couple of old cardboard boxes painted black inside.


The projection lens is an 8.5 x 11 lens from the dollar store.


The magnifying lens reverses the image so we had to flip it on the screen image.


I made the two boxes so I can slide the two to bring the image into focus.


The basement wall is the test backdrop and with the lights off it gets dark enough to be able to project using only the brightness of the laptop screen so we can pencil the logo in place to make it easier to paint following that pencil outline.


The projection is far clearer than this photo indicates but I could not use a flash.


After penciling the outline, it was time to paint.


One down, one to go.


While the primary concern and reason for this project is bed security we hope to make the folding cover as weatherproof as possible considering the fact that we have 3 sections and hinged jointsgaps. To make sure the seams are as small as possible the hinges were recessed in the wood.

To further discourage rain from entering through the hinge seam we thought the gap could be filled with flexible silicone rubber caulk. In order to make the seal as tight as possible the plan is to use a caulk gun to apply a bead (or beads) of caulk to one of the sides of the hinged joint and then close the cover causing the caulk to ooze out and fill the gap. To prevent the caulk from sticking to the other half of the joint, we applied a couple coats of paste furniture wax and buffed it. Once cured, the gap would be filled with flexible rubber and it wont stick to the waxed side of the joint.


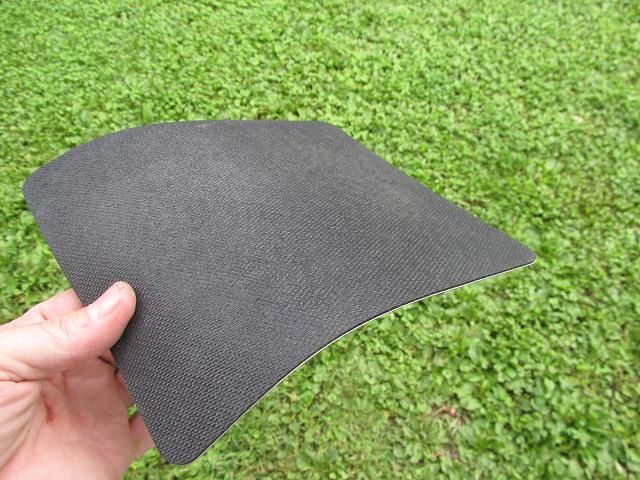
The perimeter of the sections that come in contact with the side of the truck bed will get adhesive backed, rubber weather-stripping. This will quiet the vibration/noise that would otherwise occur between the hard plastic and the painted wood. It will help keep the paint from being abraded and will provide additional sealing from rain. It pretty cheap so if it wears it can easily be replaced.


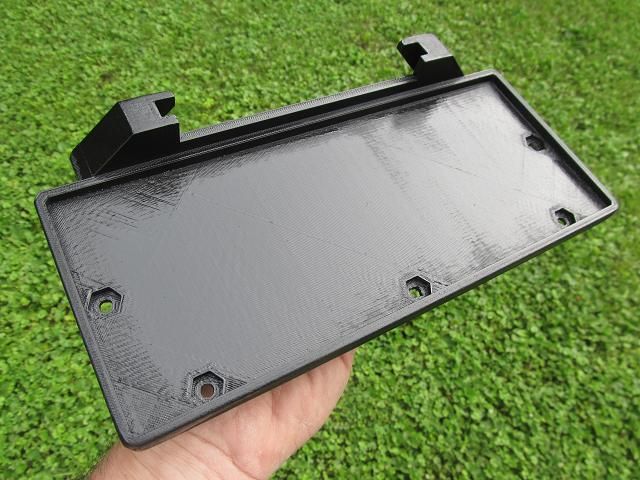
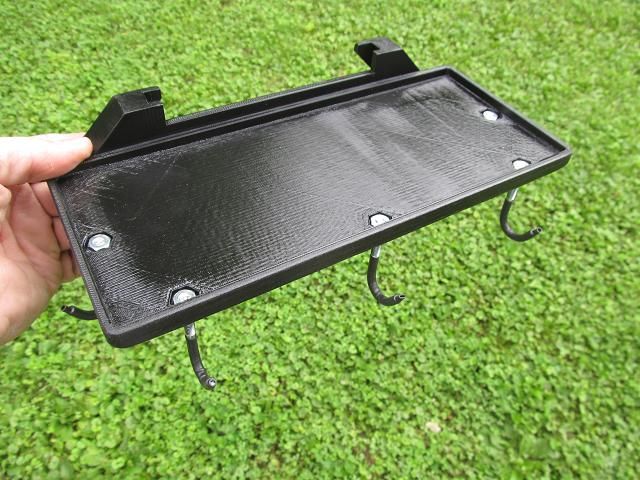
Keeping the sections closed will be done with spring loaded plungers. We picked up a 10 pack on Ebay for $8. They have a lengthy throw distance but the handles were on the small side so we increased the size of the handles with short sections of micro diameter arrow shafting and J.B. weld. The nose of the retractable plungers will fit into holes we drilled through the hard plastic bed liner and metal of the bed. We used a 1/4" drill.


Because the sections fold onto one another I cant have a hard handle so we fashioned a handle from left over webbing.


The finished weight is 55 Lbs so its easy enough for one person to remove.

Here is a video showing how to install and remove the cover.

https://www.youtube.com/watch?v=UOkdUmA79W4

77
Archery / Re: 2016 Archery bear hunting blog (the homemade edition)
« on: April 04, 2016, 07:35:18 AM »
The field points are steel and heavy. I wanted a little lighter version for the bear hunt broadhead so I switched from the re-shaped, steel, field points to aluminum adapters.

Since they are aluminum I can use a micro saw and a Dremmel tool to cut the slots.


Then it was back to the saw blade


I used my broadhead sharpening guide to make the single bevel.


I will use J.B. Weld in the slot cut in the adapter to fuse the blade and I will peen over the tip of the adapter in the hole in the blade to further trap the blade on the adapter. The J.B. Weld and eventual paint will have the final broadhead around 180 grains.

Here is a video of the fit up before fusing the parts.

https://www.youtube.com/watch?v=Y0GNV9IzqcE

78
Archery / Re: 2016 Archery bear hunting blog (the homemade edition)
« on: April 04, 2016, 07:32:53 AM »
Im making a new set of single bevel broadheads the upcoming WI bear hunt. Im planning on using field points and 7 1/4" circular saw blades for the main blade. Im slotting the field tip (ferrule) and can peen the tip of the ferrule onto the blade but the joint at the back end is more challenging.

Over the weekend I starting messing around with a prototype. Now Im thinking of instead, using a threaded adapter rather than a reshaped field point.


Beveling made easy with the right tool for the job. I get to use my own product. Video below

 https://www.youtube.com/watch?v=OmJW7zdfiR4

79
Archery / 2016 Archery bear hunting blog (the homemade edition)
« on: April 04, 2016, 07:31:26 AM »
I'll use this space to keep a journal now that Ive drawn a WI fall bear tag. I will be hunting zone D with Northern Bayfield County Guide Service

 I plan to hunt with a bow and arrow as I have no interest in hunting bear with a firearm. Im leaning towards using a traditional bow and most likely one Ive made myself. I plan to make my own broadheads and arrows as well as other homemade items for this hunt. Ive taken deer with all homemade gear but Ive not taken a bear so here's my chance. I have 6 months to prepare. I will chronicle all of that here.

80
Back to the drawing board.

Existing FOB's weigh 24.5 grains. Our early prototype of a modified annular airfoil fletch was 23 grains but like everybody else we dislike weight on the rear end of the arrow so we took out weight in no-stress areas and got the weight down to a (calculated) 20 grains (the weight of 3 blazers with glue). We won't know for certain until we make a few and throw them on the scale. Here is what they will look like now.


81
The brown truck dropped off a 3D printer for archery and bowhunting related prototyping. (and for generally playing around)


As well as a variety of ridged and flexible filament to proto design concepts.


First up is prototyping a broadhead for an upcoming bear hunt.

[video=youtube;ENFQUgQgb9g]https://www.youtube.com/watch?v=ENFQUgQgb9g[/video]


We are playing around with the 3D printer making prototypes of things we have been wanting to make or improve upon.

First up is a vision of an improved version of an existing product to replace fletching. FOB's are a good product that can be made better. Not necessarily for sale but for personal use, education and enjoyment. I made the ring a bit smaller but the fins a bit bigger.


It weighs slightly less than the FOB brand


clearance from a drop away will be a bit better with this version.


They have a 4 degree offset but I want 7 but may increase that further. FOB's fins are flat. I made this with a curve or radius like an airplane wing to see if that will improve flight. (Again, experimenting)


Time to make a few more and test shoot them.

After test firing them they still hit my face. We are getting closer but time to improve further.

1. Improved rest clearance.
2. Reduced face contact.
3. Reduced weight. (less than existing FOB and closer to 3 Blazers/glue)
4. Increased spin rate.
5. Increase total surface area of fins.
6. Airfoil fins rather than flat.

By making the annular ring smaller and pushing it forward 3/4", the facial contact issue improves as does rest clearance. I prototyped an early version yesterday but went back to the drawing board today.


Next up is a call for the stupid, smelly field carp.

I printed the pot for the call. One in black and another in Black and red and designed in some text just for giggles.


Then made aluminum sound boards


Aluminum and cooper


and a sliding top for the striker to change the tone.


Just waiting for the epoxy to cure to test them for sound.


A 3D printed shelf with hooks we made for hub style blinds.


Adding some hooks and shrink tube.


To quiet the shelf an old mouse pad and double sided tape was used.


Perfect fit.


Plenty of room on the shelf and to hang things.


82
Archery / Sherwood Forest Bowman (Sussex, WI) Traditional archery shoot
« on: February 04, 2016, 06:59:11 AM »
Sherwood Forest Bowmen in Sussex will be hosting an indoor 3D brush shoot and an outdoor 3D shoot Feb 6, 2016. Shooting hours are 8:00 AM to 4:00 PM. Breakfast, lunch, and beverages will be available. Traditional archery gear only.

For more info contact Greg Szalewski at 262 853 4648.

Address:N61 W25600 Walnut Rd. Sussex, WI 53089

Directions to clubhouse:
http://sherwoodforestbowmen.com

83
Outdoor Related Craft Projects / Badger Mittens
« on: March 30, 2015, 06:39:59 AM »
I was asked to make a pair of leather Chopper mittens for a UW Wisconsin Badger fan.  I will make these a two tone design using split cowhide suede for the palms and cow leather tanned to look like buckskin for the backs. The removable liners will be fleece with a Wisconsin Badger pattern.. Here is the starting point.


Leather parts cut out and ready for red trim.


The buckskin cow hide lends itself well to adding ink. Bucky badger added.


All the leather and trim and ink complete.


Then a deep soaking with a silicone waterproofer and set aide to dry while I work on the fleece liners. It darkens the leather but once dried goes back to its original color.


To make sure these mittens are warm I doubled up the fleece. Here are the pieces before sewing.


In progress.


The finished fleece liners with trim added.


The liners in the mittens.


My hand model wearing the finished product.


84
Outdoor Related Craft Projects / Re: Steam bending snowshoes
« on: March 02, 2015, 08:04:48 AM »
Each time I cut a piece of wood to make a snowshoe I have a piece of drop/scrap that I had been setting aside. Then I had a thought and placed the drop in the steamer box with the snowshoe wood and bent that piece of drop around a 25 pound plate from my weight set to form a wooden hoop. Since I am filling the center section of some of the snowshoes with leather and artwork I ink onto the leather (like this)


I thought, why not cut some tanned deerskin leather into circles and lace them onto the wooden hoops. So I did.


Then while attending one of the many gun shows I attend each year, I ran into a NA businessman who had a booth where he was selling all manner of native crafts. We spoke and I told him about the snowshoe wall art and lamps and the hoops. He was interested. He said he was also in the market for scale versions of birchbark canoes and stone point arrows so I spent last week in the shop and yesterday made my initial delivery of 2 lamps, 2 snowshoes and leather wall art,, a bunch of leather hoops, arrows and canoes.


85
Outdoor Related Craft Projects / Steam bending snowshoes
« on: February 16, 2015, 06:54:23 AM »
Ive wanted to learn to make snowshoes for some time but never got around to it. Now is the time I guess. Before I make actual sized and wearable shoes I will start by making half scale versions. Here is the process Im using as I learn about steam bending wood. Im using oak since Ash is hard to come by. I shape and thin the oak stick in the areas where the bends are otherwise it will break and I have broken many until I got a pattern that works.


The form I made.


The high tech steam creator (since one cant buy steam, premade)


The steam chamber is PVC


After a hour of steam It can be coaxed around the form.


and the nose bent


After a day or two its dry enough to hold the shape and crossbars are added and its sanded because the steam raises hell with the wood


Then I lace the heel and toe with deer skin and varnish everything.


Since the prototypes are half scale and cant be worn I will turn them into art pieces. The first batch will have deerskin leather enters with artwork.


Again, these are half scale.


Then I thought, since this is the 21st century I would make electric snowshoes so I bought a small light and cordset and fashioned up a lamp but I wanted a lamp that I could customize or change with the seasons. For the lampshade I printed oak and birch skin on legal sized paper on my printer. For the frame I steam bent small strips of oak.


Then I thought about adding a background that appears only when the light is on. (with oak)


Then birch


Then I went kind of nuts because its easy to change the skins.


The sky is the limit for options in regards to silhouettes but then I had another thought on how to customize behind the bark only when the light is on.


Then I went kind of nuts.


Now Im thinking 2 snowshoes side by side to create a shelf or other ideas for how to use these half sized shoes.

86
Big Game Recipes / Ven snack sticks with cheese and jalapeno
« on: May 06, 2014, 09:52:01 AM »
Im evaluating some products from Frisco Spices so I pulled a bunch of venison trim out of the freezer as well as pork shoulder trim. I used 16 pounds of Venison and 9 pounds of pork shoulder and gave it a few days to thaw in the cooler.


I ground the meat last night through the 3/8 plate.


I grind the night before the smoking because cure (Sodium Nitrate) is added to the meat and it needs time to cure the meat.

These sticks will also have mixed in with the meat some dehydrated  and crushed Jalapeno as well as high temp cheese.


This is the cure/salt. It normally pinkish in color.


I mix the seasoning and cure and jalapenos with 3 cups of water to better distribute it with the meat. Trying to mix dry seasonings with ground meat never works well and you end up with pockets of over seasoned as well as pockets of underseasoned meat. The cheese will be added later.


After seasoning and mixing the meat is packed tightly so there are no air pockets and then covered and removed to the cooler overnight so the cure can do its work.


This morning I preheated the smokers and then ground the meat a 2nd time. This time through a 1/8 inch hole plate.


The cheese is added right before stuffing.


Its kept frozen until its poured over the meat and then mixed in with the meat for even distribution.


Then half is loaded into the 100 year old Enterprise stuffer and the wife and I get to work.


I normally use 19mm collagen casings but this package came with 21 mm so they will finish out a littler larger in diameter than my finger. Larger diameter just mean more time in the smoker.


The stuffer tube  I made will work for as small as 18mm (3/8 of an inch


Collagen casings are edible but unlike natural casings do not need to be rinsed in water. They are used right from the package. I turn the crank and my wife regulates the fill to make sure they are not underfilled and so they don?t burst. Collagen will split and burst if you try to get them too full


The lengths are coiled during stuffing. Its just easier to manage them that way.


I start with the smoker preheated to around 100F and all dampers open. The coils are then straightened out and since my smoker was built with lots of head room, I cut them into 66 inch lengths and pinch the center where they will hang on the smoke sticks.


For these sausages I will use a mix of Hickory and Pecan chunks.


After one hour of dry time I add the wood chunks to start smoking. Less in more when it comes to smoking sausage. You don?t want soot or ash so a little smoke is all that?s needed.


Throughout the morning and afternoon I slowly raise the temp to 180F. I have a remote probe in one stick of sausage so I can monitor the batch. When they get to 170F the door is opened and they are allowed to cool in the smoker.


The distribution of cheese and jalapeno flakes looks good.


When cool enough to work with, they are removed from the sticks and then cut into manageable lengths. They then are placed in the cooler overnight and then vacuum sealed. 25 pounds of meat with the water, cheese, spices and jalapenos came out to 30 pounds of pre-smoked sausage. The final weight of the finished product was 20 pounds.


87
Big Game Recipes / Frisco Spices Jerky weekend
« on: April 13, 2014, 03:06:35 PM »
I make a lot of jerky (both beef and venison). Like everybody, Im always searching for the best jerky recipe or pre-mixed seasoning package so Im always trying new products. Over the weekend I tried a new brand of jerky seasoning from Frisco Spices out of Nebraska. http://www.friscospices.com/ Im trying their Hell?s Creek Jerky spices to make 25 pounds of venison jerky.


I always freeze my venison trim in gallon sized Ziploc Freezer bags and thaw it a couple days in advance of a jerky making weekend.


Once thawed (but still stiff with ice crystals) I grind it first through a 3/8 plate


After the first grind I mix the seasoning with water. Trying to get an even distribution because using the seasoning dry never works and you end up with a spotty mixture where some of the meat is over seasoned and some is under seasoned.


The packet says to use 1 cup of water but for this volume of spices I use 2 cups to get the best distribution. The pink packet is a sodium nitrate/salt mix that you need to stave off botulism.


The water and spices and cure are then poured over the meat.


Then (wearing rubber gloves) I mix the meat by hand until I cant feel my hands any more and my fingers start to ach from the cold.


Then I switch my grinder to the 1/8 inch plate.


And grind the meat a 2nd time. This improves the texture and more thoroughly mixes the spices with the meat ensuring consistency and it makes sure the cure contacts all the meat.


Then the meat is punched down tightly to remove air pockets and then covered with plastic wrap.


Then the covered meat sits in the cooler over night. This allows the sodium nitrate cure do its magic to ensure all the meat is cured so it is safe to consume because the jerky is not cooked at high temps but rather slowly dried at temps no higher than 165F.


Then its time to do the dishes. I don?t delay because the salt in the second grind will raise holy hell with the steel parts and knives.


When dried, I always spray down my blades with a food grade oil to keep them from rusting. Ive had this set of blades for more than 20 years.


I wrap the blades in paper towel and store them in Ziploc bags (to keep them from getting dulled by banging into the other blades) and then I store my blades in the freezer where the humidity is very low.


The next morning I use a jerky cannon to make strips right on the drying racks.


I always wipe down the clean racks with non-stick cooking spray that I spray onto a paper towel. I don?t like to spray directly onto the racks because it?s a mess and you get oil lines on the dried product that looks bad.


Since some in my family like hotter jerky I sprinkle a few of the racks with crushed red pepper flakes while the meat is still moist and tacky. I put on twicw as much as it needs since half of it will fall off during drying, cutting and vacumm sealing.


My dehydrator is a home made version that allows me to make up to 30 pounds at one time. The heat comes from two electric hot plates that produce 1000 watts each. It is built of wood and lined with metal (aluminum). In order to move it around I made it in two halves. One half is the heater and fan box. There is a screen (filter) separating the two chambers.


The other half is the dehydrator box with supports for ten drying racks. It is also lined with metal (aluminum).


Then the racks spend the next 8 hours in the dehydrator. I start it out at 140 and slowly raise the temp to 165F.


During the drying process I rotate the racks back to front as well as top to bottom to make sure everything drays evenly.

Fast forward 8 hours and its finished.


The strips are cut to length and vacuum sealed


Im very pleased with the flavor. Its got a late heat that hits the back of the tongue. Now I need to make some smoked summer with crumbled cheese and Jalape?o.

88
So your bluing looks good and it wears well but how does it stand up to corrosion? That is after all the reason we blue our guns. So I did a corrosion comparison. I mixed a cup of tap water with one tsp of non-iodized table salt to act as the corrosive medium. Why that ratio??? Saline solution and our tears are equal to ? tsp of salt to a cup of water. I was looking for something a bit more corrosive to speed things up.  I need a container to hold the metal samples and the salt water. When your wife is searching the web for instructions on how to replace a leaky kitchen faucet you can steal away with a 9 x 13 baking pan unnoticed to put your metal samples in. I will return it when Im done.

Not wanting the pan to influence the evaluation (and because I don?t like getting yelled at) I laid down 2 layers of freezer paper and then a paper towel. I sprayed down the paper towel with the salt water to saturate it.


Next I sprayed barricade rust inhibitor on a paper towel and wiped only the 400 grit side of the samples and laid them on the wet paper towel because I wanted to test the corrosion resistance of Barricade since we all wipe our guns down with oil or some protective film. Nobody reblues a gun and leaves it unprotected. That being said, the polished side of the steel went without any protection to see if any of the raw blues performed better against corrosion than the other blues. The controls were protected as the image below describes.


As you can see, each blued sample, on the polished side (thanks to taping off at certain times) will have a blued area, an abraded area and an unblued area. Then the samples were covered with another sheet of paper towel and again saturated with the salt water solution.


Lastly another layer of freezer paper was used to depress the paper towel against the samples to make sure contact was made and the entire pan was then covered with plastic wrap to keep it from drying out so as to maintain a humid environment. The plan is to let the samples rest for 24 hours or until my wife notices her pan is missing.


Meanwhile, my wife is making great progress with the sink ??????..


After 24 hours of the samples sitting in a salty/humid environment, they were uncovered and examined.


Initial observations of the polished side show that F and A had the least amount of corrosion. Note that control G was not blued nor protected by Barricade and it faired the best of all. This is because a polished surface always stands up the best to corrosion. I learned that a long time ago as a custom knife maker. Highly polished knives are less apt to corrode than rough finished knives.


The samples were then wiped dry and buffed with steel wool to remove the corrosion and compromised bluing. Since still photos don?t do it justice I shot a video to show the appearance of the metal samples. You can see where the bluing was completely removed. (more reason to use a rust prevention solution on your guns)

https://www.youtube.com/watch?v=kk2vL7spEzA

Then I flipped the samples over to observe the 400 grit side that was blued and protected with Barricade. Despite the Barricade some samples still corroded but only slightly. Samples F and A had the least visible corrosion.


Another view


Here is a video of the 400 grit side after being steel wool buffed.

https://www.youtube.com/watch?v=iO_zIvz4hB8

I replaced the freezer paper and paper towel in the pan with new versions and again wetted it with the same salty solution. This time I coated all blued samples (both sides) with Barricade and again laid them on the paper towel since its pretty clear what happens to unprotected metal.


And again I covered them with another paper towel that was saturated with salted solution. By now you have probably observed that the cake pan did not stand up well to this environment. I have not shown the pan to my wife yet. My wife likes her jewelry, while it may seem out of date she still wears a mood ring. When she is happy, it turns blue. When she is angry it leaves red marks on my forehead. I will delay showing her the pan for now.


The plan is to leave the samples in this humid environment for another 72 hours. This will give me some time to run to the store to buy a replacement cake pan. This kills two birds with one stone since Mother?s Day is coming up and a new cake pan wrapped up with a boxed cake mix makes a perfect gift for any mother. I won?t make the mistake of buying her a leaf rake and weed trimmer line like last year. I think she liked them although she mumbled something that sounded like ?shoulder pads for a snake?

Fast forward 72 hours and this Is what the samples looked like after removing the top layer of paper towel. This is the 400 grit side with a heavy application of Barricade. Samples A and F look the least corroded.


Clearly no bluing (which etches and compromises the metals surface) performed the best while unpolished, unblued  and with no barricade  (Lower left sample) performed the worst based on the picture below. This suggests that if you highly polished your gun and didn?t blue it at all, it would stand up the best to corrosion (but would be shiny as all get-out)


Again, still photos make it hard for you to see what I see so here is a video of the polished side.

https://www.youtube.com/watch?v=_ycMIBtaOI0

The final comparison was going to be cost but because none of these products will break the bank since they can be purchased in such small sizes I don?t know if price is a motivator or a reason to buy one product over another. Are you looking for the best bluing product for your firearms or are you buying based on price???? The prices ranged from $8 to $13, Again, not enough to make a purchase on price point alone and since any one of these bottles of blue will last the average sportsman a lifetime of touchups, price really isn?t that much of a driving factor.

It should be noted that many of the blues cost more for shipping than the product itself and paying for shipping is not a value added expense. Having purchased Dicropan many times through the mail I can tell you that caustic and hazardous shipments can really inflate shipping costs. The last time I bought Dicropan from Brownells the product cost was $12 and the shipping was $15. Those extra $15 didn?t make the gun any bluer or protected from the environment. If you do not live in the lower 48, you may not be able to get all of these products via the mail. But since I touched on the price factor,  the lowest cost for shipping via an online order was F.

With all the evaluations complete, my notes indicate that I should probably be switching my standard, go-to blue. (that was after all the reason for spending the time and money and straining my relationship with my bride on this evaluation) I want to provide myself and those I do restorations for with the best cold bluing I can get my hands on and based on color, uniformity, abrasion resistance, and corrosion resistance, I need to stock up on ?F? Nu-Blu. You however are free to buy which ever blue you like. I am not trying to tell you what to do.

Lastly, as it relates to rust inhibitors, Your gun cost you plenty. You want it to look and perform well for many years. Protect the metal. Remember this. Oil is a lubricant. Its not a rust preventative. Oil is also hard on wood and gun finishes. Get a product that is labeled as a rust preventative or inhibitor and put it on the metal only. In the future I plan to secure a variety of rust inhibitors to do an evaluation much like this one.

I want to thank this pan for giving its life in the service of gun owners everywhere. Although I wonder if there might be is a cake pan restoration thread in all of this? I could strip the finish and blue the whole pan. My wife would be the envy of the church cake ladies with such a tricked out piece of cookware. Sounds like a great birthday present.


So there you have it. Not all blues are the same or created equal. Use this info as you see fit.


89
Here is the lineup of blues.


The bottom of each sample was taped to prevent bluing from contacting the metal for reasons that will be explained later. Here is the lineup of samples. A thru F are the bluing samples, the other 2 are the controls and have also been polished on one side and 400 grit bruised on the other. An additional control will be added which is a sample from the same sheet of steel but it will have nothing done to it in terms of sanding or polishing or bluing.


Each sample is then blued according to the Mfgr instructions. This is the appearance after the first application of blue. The first application does the most to the steel in terms of forming the oxide and black powdery soot (for lack of a better term). The first application does the most in regards to etching the metals surface. These samples have not been steel wool polished to remove the oxide soot. Samples A and E were the most caustic to the steel while C and D made the steel the blackest. After the blue was applied I wiped the pieces down with a clean paper towel prior to rinsing with water.  All the samples soiled the paper towel with black soot except F. The soot was brownish red from F.

The dried samples were then buffed with 0000 steel wool. This is their appearance after the first bluing application and buffing.


Bluing etches the metal as it forms the oxidation. This impacts the polished surface. Not all the blues were equal in the caustic etching. Samples C and F retained the polished finish the best. Its hard to tell from still photos so I shot a short video showing the samples. You can see by the reflection of the overhead lights in the metal which samples retained their polished surface and which ones etched away the smooth surface finish. This video is of the polished side of the samples

https://www.youtube.com/watch?v=IzTfH0UHjSE

This video is of the 400 grit side.

https://www.youtube.com/watch?v=lM1dWtK-_rM

I took notes during the bluing. This is what I noted.

The least powdery (soot) finish was created by F

The least streaking (overall uniform finish) was sample F

The darkest bluing of the metal was on samples C and D

The least coloring (bluing) was sample E

The most streaking and powdery buildup was sample E

Then all samples were blued 3 more times. Here is an image after all bluing and buffing is complete.


My notes state the following

The least overall streaking and most uniform finish were samples B and F

The least caustic (white corrosion forming while the liquid sat on the metal) were D and F

The sample that retained the most polished finish on the metal was F

The darkest sample was D followed by F

The least dark was E

I asked my wife to write down her observations but the words she used most likely would not make it past the censors. She is such a kidder.

With this first comparison complete and based on these criteria.

Darkening/bluing of the steel

Uniformity

Retained surface polish

I have to give the nod to F with C and D coming in close behind.

Bluing, coloring the steel is all well and good but how it stands up to use is just as important (unless you like to reblue over and over because it wears through) so the next step was to evaluate how well the different blues stand up to abrasion.  All the blued samples were taped off with a double layer of painters tape at one end of the sample so it would not be worn away but would lay directly next to the wear area for comparisons sake. Each sample was placed in a vise and given 200 strokes with a fine bristled (but stiff) stainless steel brush. Each sample will also get 100 strokes with 000 steel wool, then the tape will be removed to compare the wear and non-wear areas to see how well they retained the blue. This abrasion exercise is far more aggressive than normal gun use and would be considered extreme abuse but I didn?t have 10 years of pulling a gun out of a cloth case to see which wears better.

Here are the samples before the abrasion exercise.


Here are the samples after the abrasion process.


And viewed from another angle.


My notes state (and the pictures show) that samples D and F retained the most bluing and sample E lost the most bluing (but then E was the least blued to begin with).

During this process and so I get an additional opinion I would show the samples to my loving and supportive bride and ask her to point out the darkest and the shiniest and the one that retained the most bluing, etc. (also because she knows nothing about guns or metal or bluing or why this would matter, she would be a good impartial observer) She doesn?t say much but when she does she gets right to the point. So when I asked for her thoughts she looked at me and said:

?(Sigh) I thought  you were going to fix that dripping kitchen faucet today? You promised me you would do it this weekend and  the new faucet is still sitting in the box on the kitchen table? You always get sidetracked by your gun projects and my projects  always blah blah blah blah blah (eye roll) my mother warned me that you were blah blah blah.?

But anyway, I digress. For the ability to stand up to abrasion (and haughty criticism with a hint of frustration) the nod goes to D and F. The samples that gave up the most bluing were E followed by A.


90
If you have read any of my restoration threads you know I do a fair amount of cold bluing. I?ve gotten a few messages asking about the task and which cold blue is best. The thing is I really don?t know how to answer that since it?s hard to define best. Is it the lowest cost blue or the one that is easiest to apply or the one that color matches your gun the closest or is it the one that staves off corrosion the best or is it the one that does not wear off?? I don?t think there is one that meets all those criteria but I am willing to find out.

For most people, it might be the one that their local store carries so that?s all they have tried. At the same time there are questions from capable folks wanting to tackle their gun project but are uneasy about baring the metal and touching up or rebluing an entire gun out of fear (and the cost of a professional job) so they do nothing.

Since we learn by doing and improve by self reflection and because I too can get in a comfort zone with products I use, I decided to get a bunch of cold bluing products that are easy to find (the internet makes all of them easy to find) from local stores such as Gander Mtn and Cabelas and online from Brownells or at gun shows. All the products would be easily obtainable to somebody planning to do some bluing. I bought mostly known name brands (but not all of the brand as I don?t have unlimited time or money) to do an evaluation.

But first, a few things to get out of the way.

1. This is not a test. To call it such would be unfair to every test heretofore conducted. This is an evaluation and a comparison of several cold bluing products, nothing more, nothing less. If the cold bluing nirvana exists and it?s not part of the list of products I bought, then the best I can do is tell you about ones I am about to try.

2. I am not a pro. I am a hobbyist just like you but with some experience with metal, be It making custom knives or gun parts or gun restorations. I have a day job in the medical engineering field and metal and guns and knives are just relaxation. This evaluation is not for the experience bluer with a favorite product and special tricks to get a better blue job. This is for the novice contemplating trying bluing but confused by all the brands/claims available. This is not MY way of using blue but rather the Mfgr's instructions for using their blue.

3. I anticipate complaints and helpful comments about how I should have done this for better results. That is not the point of this evaluation. The average guy wont know special tricks and techniques to get better results and will only follow the instructions so if you have found better results by first coating the barrel in ketchup or lime-away or unicorn pee or only bluing during a full moon, that?s great info and I think folks would like to know your special tricks to achieve improved results (if you can quantify it with substance) but for the purposes of this evaluation it would be unfair to do anything but what the directions instruct.


4. I am not beholding to nor affiliated with any product or company I am about to mention. I?m just curious about cold bluing (and based on messages I have been getting, so are you.) I plan to be completely impartial since I have no reason to try to sway the results since I am hoping to find the best blue to use myself.

Enough prattle. The products I will be evaluating are (in no particular order)


Everything you want to learn about G96 can be found here.

http://www.g96.com/products/gun-blue-creme/#


Everything you want to learn about Oxpho-blue  can be found here.

http://www.brownells.com/gunsmith-tools-supplies/metal-prep-coloring/metal-bluing/liquid-cold-bluing-chemicals/oxpho-blue-reg--prod1072.aspx


And this will educate you about Dicropan T4

http://www.brownells.com/gunsmith-tools-supplies/metal-prep-coloring/metal-bluing/liquid-cold-bluing-chemicals/dicropan-t-4--prod1085.aspx


Here is the link to Birchwood Casey Perma blue

http://www.midwayusa.com/product/419877/birchwood-casey-perma-blue-cold-blue-3-oz-liquid?cm_vc=ProductFinding


Birchwood Casey Super blue.

http://www.midwayusa.com/Product/284241/birchwood-casey-super-blue-cold-blue-3-oz-liquid


And Finally Nu-Blu from the Stock Doc. (which appears to only be available online or at gun shows. I bought mine a 2 weeks ago at a gun show from the Stock Doc booth.

http://stockdocusa.com/products.html

I know what you?re thinking. ?Awe man he isn?t trying Brand X or brand Y and that?s what I use or can get my hands on.?

Sorry.

Ive asked my wife to assist me with this evaluation. She is always commenting on how we never spend enough time together. This will be a good bonding experience.

The sample metal sticks were all sheared from the same cold rolled steel sheet into manageable sample sizes


Then all were given a unique alpha identifier stamped into both sides that will be linked to the blue brand. You may have noticed there are more samples than there are bluing compounds. The extra samples will serve as a control since I plan to do a corrosion evaluation after bluing coupled with Birchwood Casey Barricade as well as an abrasion resistance evaluation. More on that later as I need to encourage my wife to work a little faster at the buffing wheel. You know, more work, less talk and make sure to lift with your back and that sort of positive encouragement.


A common theme in messages I have gotten is in regards to metal finish and metal prepping cleaning) and if mirror polishing is needed for a good bluing job. It been my experience that time spent prepping the metal is never wasted and a blue does not hide defects in metal finish, it actually makes them easier to see. So to that end, each sample is polished on one side and the other side gets a 400 grit brushed finish since that is comparable to the finish on many guns and any swinging Dick can buy 400 grit sandpaper and 0000 steel wool and produce that quality of finish on an entire gun or to spot remove rust from a portion of a gun. And because when I told my wife to polish both sides of the samples I had to dig one out of the drywall just to the left of my head. I think she has a little ninja in her.

Polishing was done on a very simple flannel buffing wheel with red rouge. Anybody with a bench grinder or drill press or even a hand held drill that lives near a hardware store can (if they desire)  pick up a buffing wheel and buffing compound. The question is, is the repair you are doing next to metal that has a brushed finish or a polished finish because matching the blue won?t mean a darn thing if you don?t match the metal finish. Polishing a spot while the surrounding metal is brushed won?t match just like a rough finish surrounded by polished metal won?t match and no brand of blue can correct this.

Here are the samples viewing the polished side.


And the 400 grit brushed finish side.


Here is a very brief video of one of the samples so you can wrap your head around how they look prior to bluing. (I won?t win any awards for cinematography and yes I?m wearing Crocks (deal with it)

https://www.youtube.com/watch?v=oxEkvMCaFMA

I read a lot of comments about what to clean the metal with prior to bluing. There are all sorts of ideas and ways to do this but simple is better. All you are trying to do is apply blue to clean metal that has no dirt, grease or oil to prevent bluing action. No need to get fancy. Acetone or denatured alcohol is all you need, hell hot soapy water with a rinse will do. You don?t need acids or etching media (because the blue will etch the metal just fine all by itself). None of the makers of bluing instruct users to use vinegar or acid or any other specialty product to etch or srip or clean the metal. While I understand that people are free to take additional steps in cleaning metal if they really think it helpful but I will be sticking to mfgr intructions for a fair evaluation.

All the metal samples for this evaluation were cleaned and degreased in the same manner.  Acetone was used as the final degreaser because clean metal is paramount to a good blue job. Once cleaned, do not touch the metal with bare skin unless you like to see fingerprint spots where the bluing wont take. The chems you use for bluing are caustic poisons. Wear rubber gloves to protect you and the metal. (note. Not all rubber gloves will stand up to acetone)

Follow the instructions. Each bluing product comes with instructions for the best possible results. Follow them. All the blues I am about to evaluate were used according to their instructions. All stated that it should be applied, allowed to work and then rinsed off with water to neutralize the action of the bluing agent or simply wiped off. They all stated to buff/card the area blued with fine steel wool after bluing.  Some but not all stated that additional applications may be needed to achieve a desired color or color match.  Trust me ALL of them will require more than one application especially if you are doing a complete reblue. I will show you how each sample looks after just one application of blue and then I will apply 3 more applications for a total of 4.

**note I have been known to apply as many as 7 applications on guns I have worked on until I got the desired results**

The process will be

clean

blue (applied with cotton)

rinse with water and dry (or wipe dry)

buff with Steel wool

repeat 4 times  with the last application of bluing applied with steel wool

One deviation from this SOP was made for the Stock Doc brand bluing (Nu-Blu) which called for heating the metal before applying the blue. I heated the metal with a propane heat source each time to a temp I could handle without burning my rubber glove covered hands. Again I am keeping with the instructions from the Mfgr to make sure each is getting a fair shot. Nu-Blu was the only blue which instructed me to heat the metal, The only other blue to mention heat was G96 and as you can see from the front label it states ?No heat required?. I know heat affects metal but I would think that if better results could be achieved with heat the Mfgr would instruct you to apply heat. Since Nu-Blu was the only one instructing to heat the metal, That is the only brand in which pre-heating was used.


Pages: 1 ... 4 5 [6] 7 8 ... 26
Google
Web http://www.wisconsinoutdoor.com